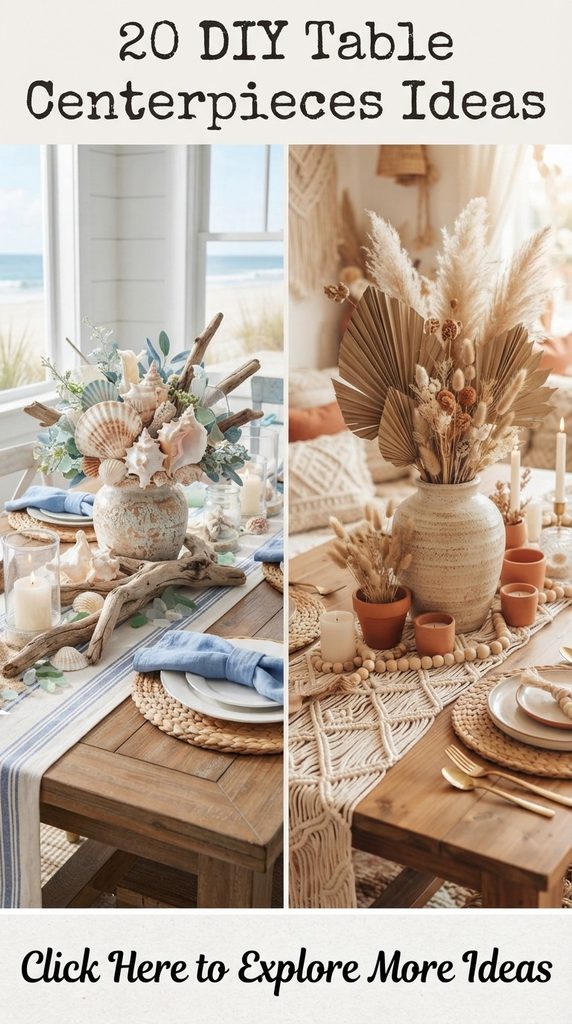
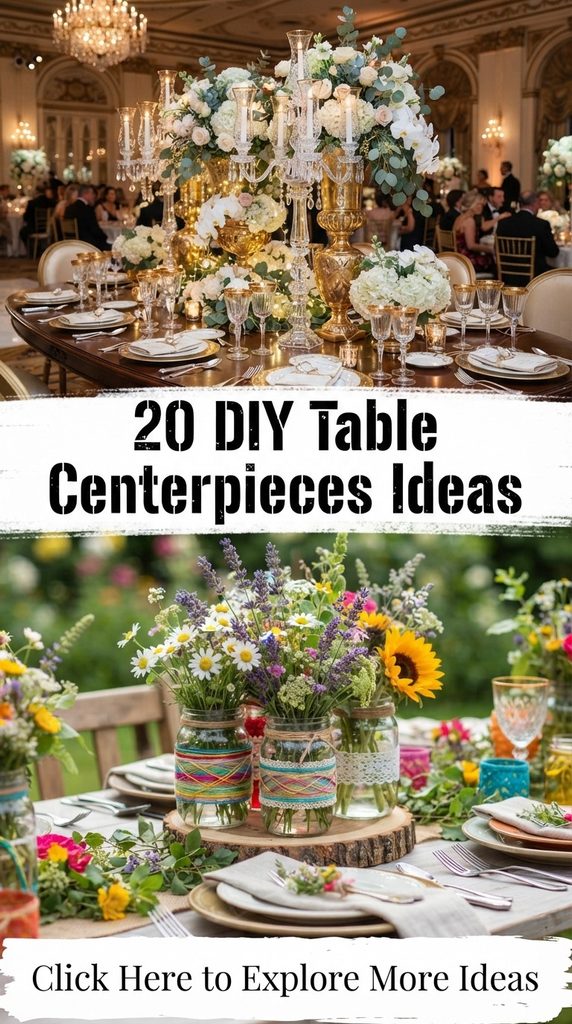
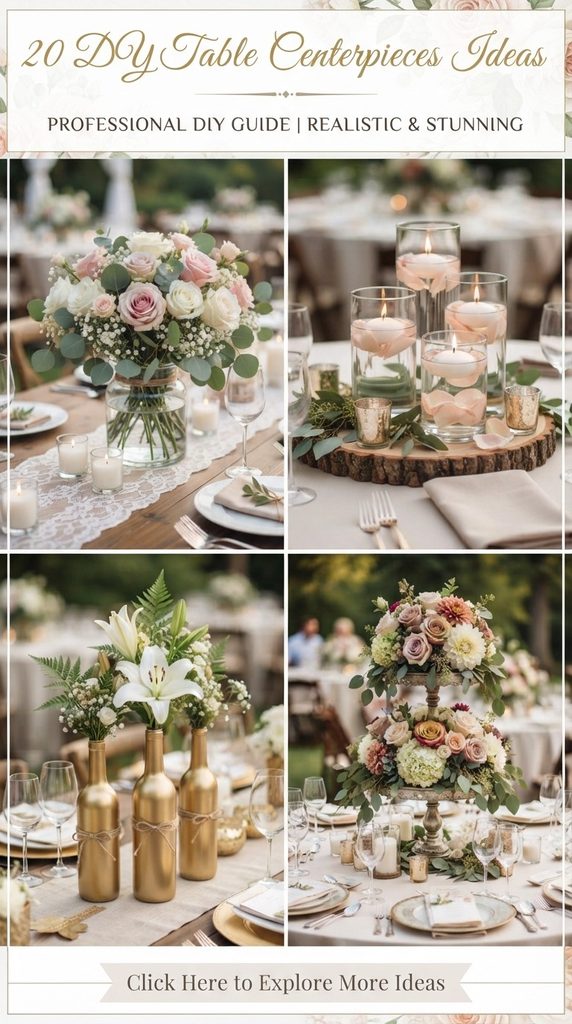
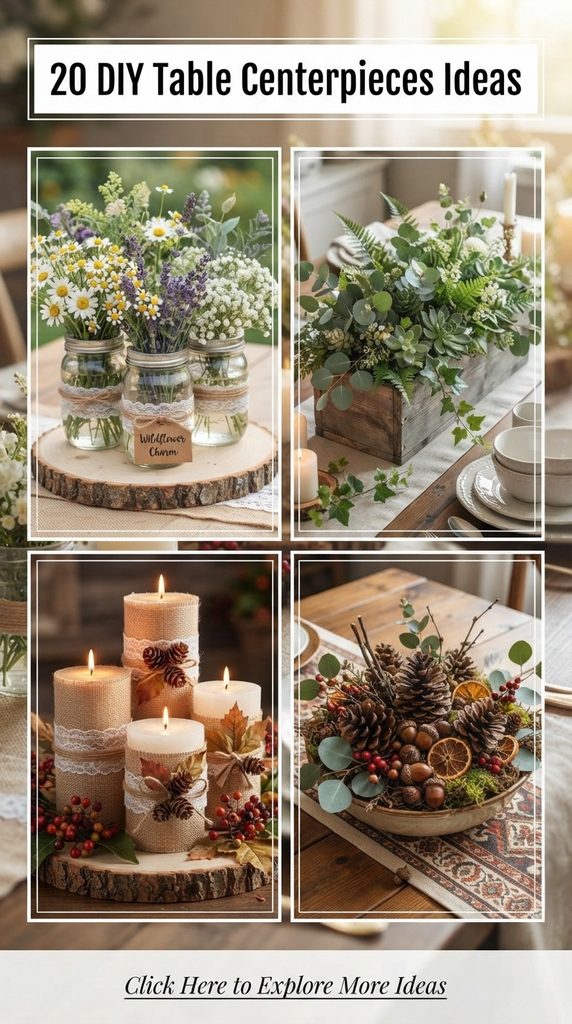
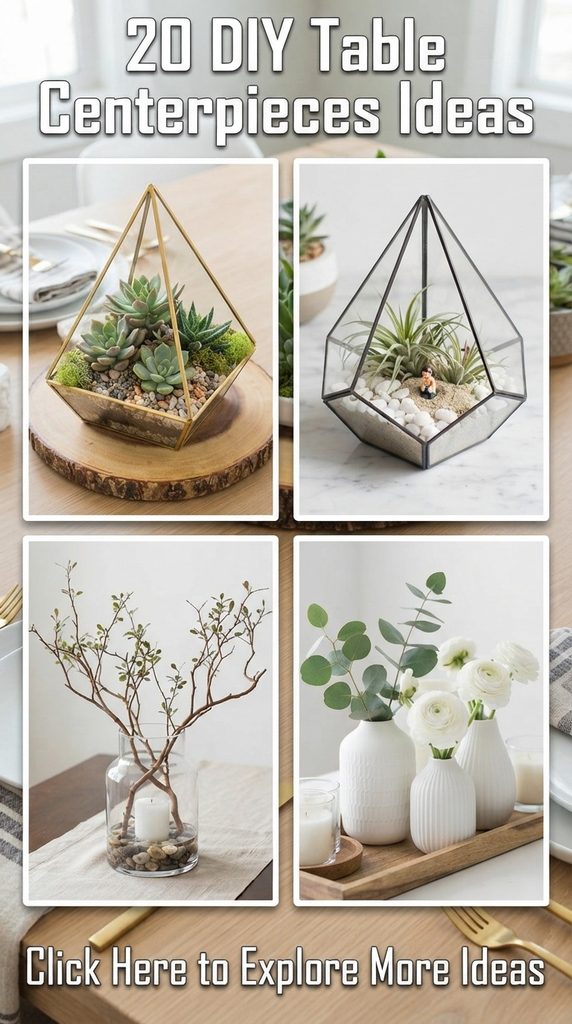
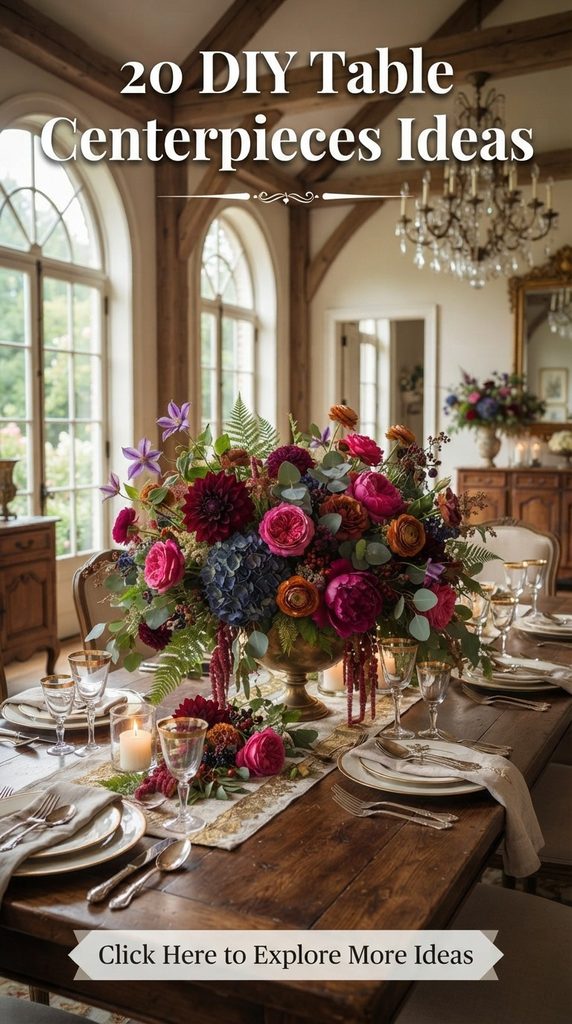
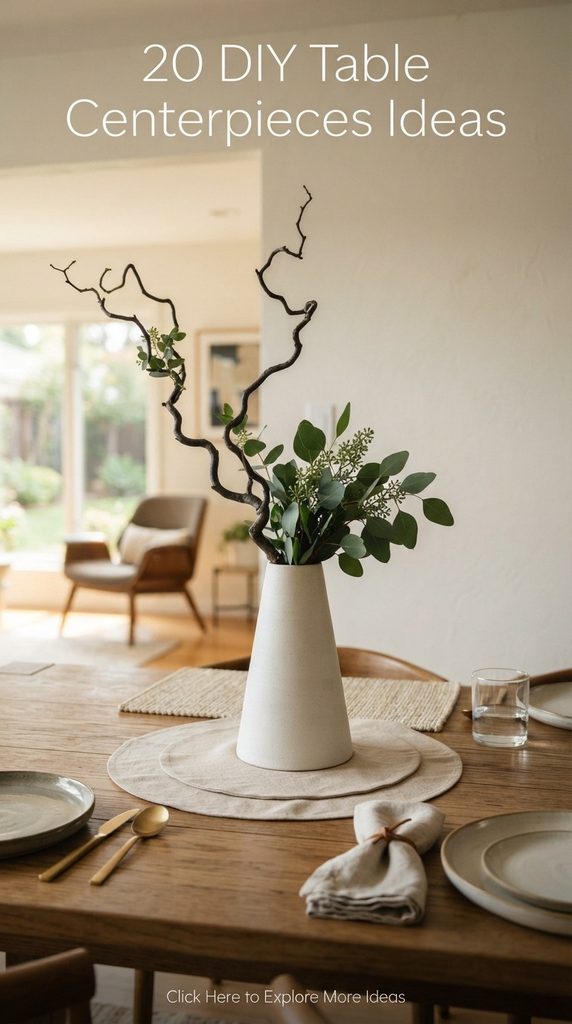
Transforming a dining table, coffee table, or event space from ordinary to breathtaking doesn’t require a massive budget or professional event planning credentials. Often, the most memorable tablescapes are born from creativity, resourcefulness, and a personal touch. Crafting your own centerpieces allows you to tailor every single detail—from color palettes and textures to height and scale—to fit your exact interior style, whether you lean toward modern minimalist, rustic bohemian, vintage romantic, or moody organic.
Creating handmade statement pieces brings an unmatched sense of warmth and pride to your home. When guests gather around a table adorned with something you carefully crafted with your own hands, it sparks conversation, sets a welcoming mood, and instantly elevates the entire atmosphere of the room. This comprehensive guide explores twenty distinct, visually striking, and Pinterest-ready DIY table centerpieces. Each idea includes a curated supply list, step-by-step instructions, insider styling tips, and creative variations to help you adapt the project to any season or celebration.
1. The Floating Botanical Glass Cylinder
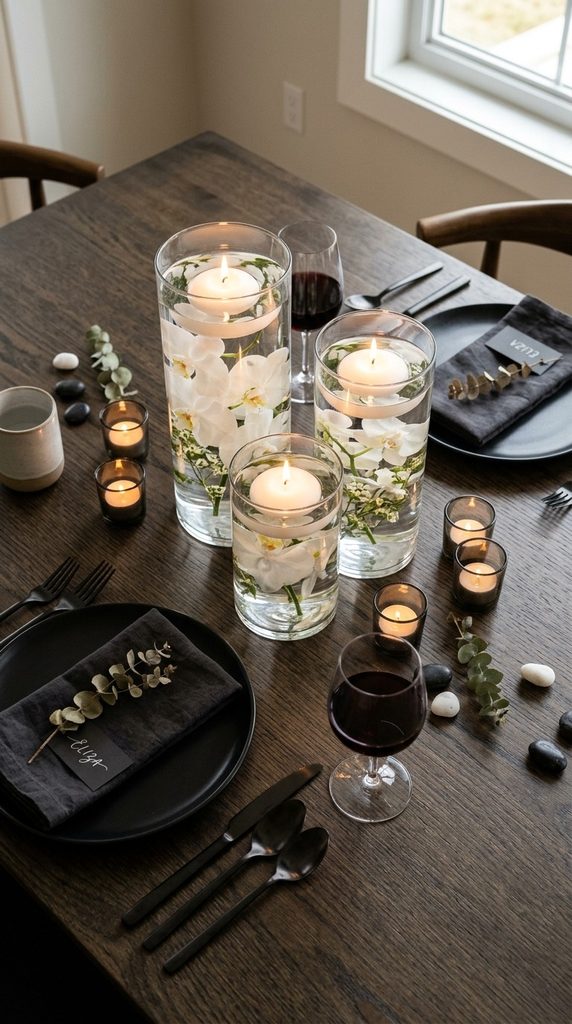
This ethereal centerpiece creates a mesmerizing illusion of weightless floating florals, making it ideal for minimalist or modern spaces where clean lines and transparency are key.
- Supplies Needed: Tall clear cylindrical glass vases (varying heights of 8, 10, and 12 inches), fresh stems (such as orchids, roses, or calla lilies), clear fishing line or floral wire, flat river stones or glass gems, and floating candles.
- Step-by-Step Instructions: Place a small handful of clean river stones or glass gems at the bottom of each cylinder to serve as a secure anchor. Trim your floral stems to varying heights so they sit at different levels inside the glass. Tie a small piece of clear fishing line or floral wire around the lower stem of the flower and anchor it discreetly to the stones at the base, or simply let heavy-headed blooms rest naturally if they fit snugly. Fill the cylinders gently with room-temperature water until the blooms are fully submerged. Place a floating candle on the top surface of the water in each vase. Group the cylinders together on a reflective mirrored tray for added depth.
- Tips and Variations: Use distilled water to prevent mineral buildup and bubbles from clinging to the glass walls. For a tropical theme, submerge vibrant monstera leaves or hibiscus blooms. For autumn, submerge crimson maple leaves and small faux acorns weighted down with copper wire.
- Maintenance Note: Because the flowers are submerged, they will absorb water continuously, but fresh blooms usually last 3 to 5 days before starting to cloud the water. Refresh the water every two days for maximum clarity.
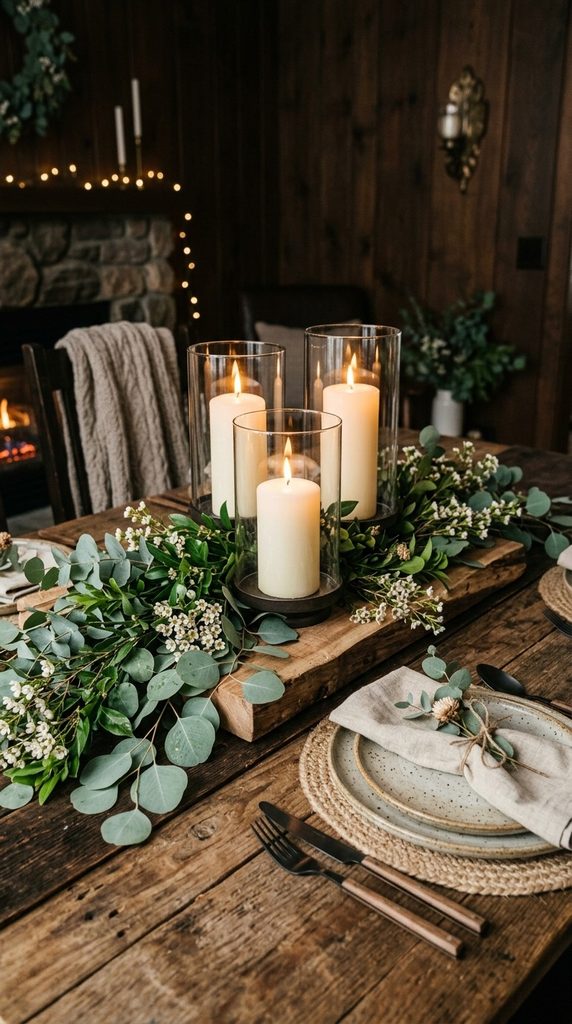
2. Rustic Eucalyptus and Pillar Wood Slice
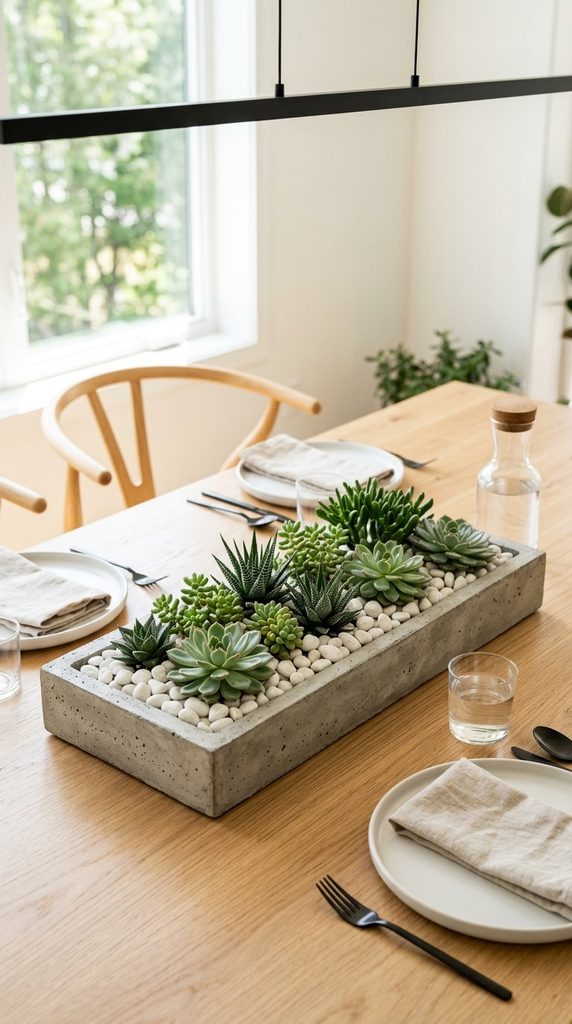
Bringing the outdoors inside is a timeless way to ground a dining space. This centerpiece combines the raw, organic warmth of natural wood with the soft, silvery-green texture of fresh eucalyptus.
- Supplies Needed: A large, kiln-dried wood slice or tree slab (approximately 12 to 14 inches in diameter), three pillar candles of varying heights in glass hurricanes, fresh seeded and silver dollar eucalyptus branches, and sprigs of dried lavender or white wax flowers.
- Step-by-Step Instructions: Place your wood slice flat in the center of your table. Position the three glass-enclosed pillar candles slightly off-center to create an organic, asymmetric grouping rather than a rigid triangle. Weave the fresh eucalyptus branches around the base of the candles, allowing the cascading leaves to spill gracefully over the natural edges of the wood slab. Tuck small sprigs of white wax flowers or dried lavender into the gaps to introduce subtle pops of color and textural contrast.
- Tips and Variations: Mist the eucalyptus daily with a spray bottle to keep the leaves supple and fragrant. To transition this centerpiece for winter, substitute the eucalyptus with frosted pine branches, pinecones, and red winterberries. For a spring brunch, nestle miniature painted quail eggs among the leaves.
- Styling Advice: Pair this centerpiece with neutral linen napkins, matte black flatware, and handmade ceramic dinnerware to enhance the earthy, organic aesthetic.
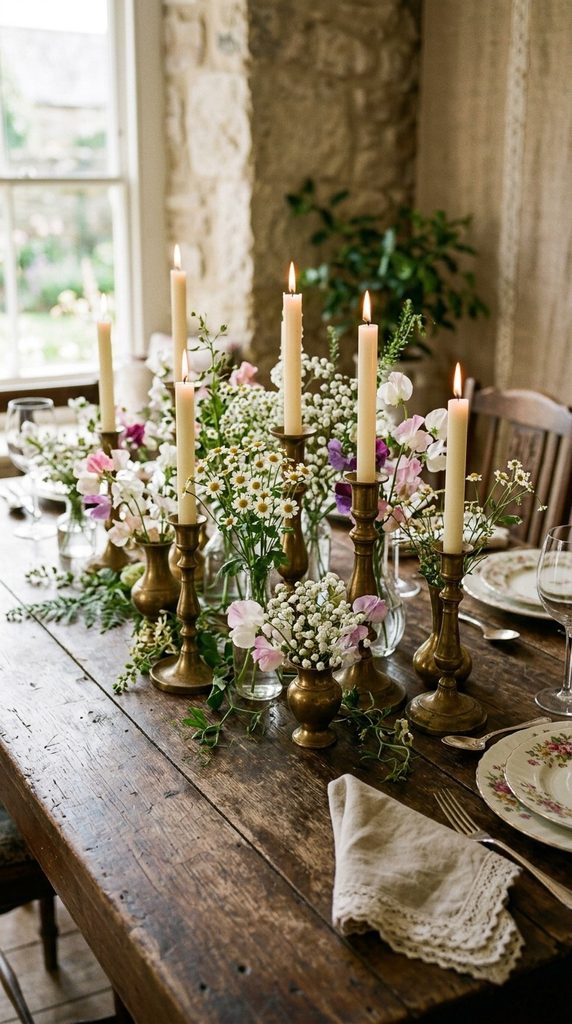
3. Vintage Brass and Wildflower Cluster
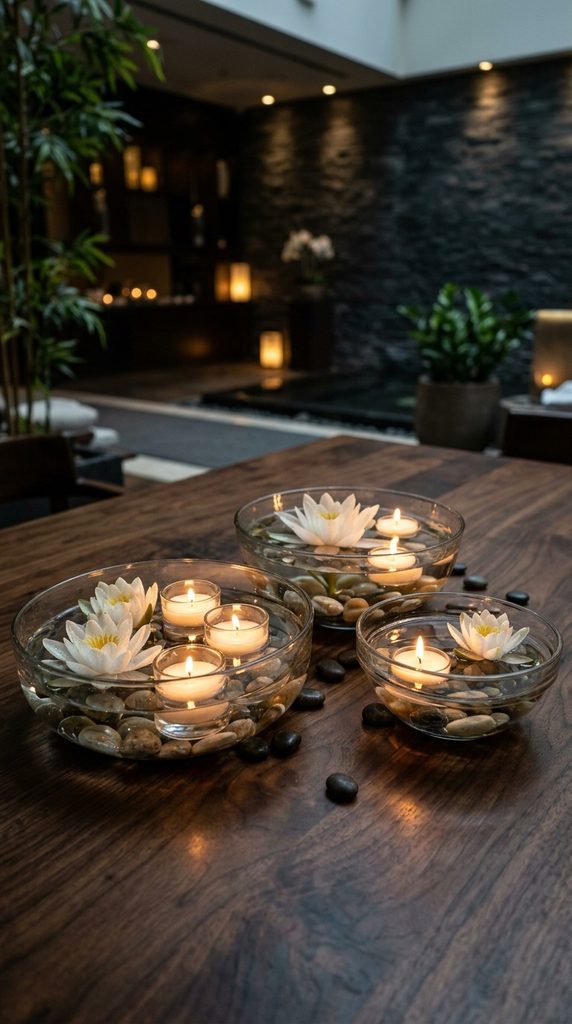
Mixing mismatched vintage metals creates an effortlessly curated, heirloom look that tells a story. This cluster arrangement relies on height variations and delicate wildflowers to feel light and romantic.
- Supplies Needed: A collection of 5 to 7 vintage brass candlesticks and bud vases of varying heights, a mix of fresh wildflowers (such as chamomile, baby’s breath, scabiosa, and sweet peas), taper candles, and a fine-toothed floral frog or chicken wire.
- Step-by-Step Instructions: Polish your brass pieces lightly if you want them to shine, or leave them with their natural patina for an antique feel. Arrange the bud vases and candlesticks down the center of the table in a staggered, linear cluster rather than a tight clump. Fill the bud vases with fresh water and insert 2 to 3 stems of wildflowers into each, ensuring varying heights. Secure taper candles in the brass candlesticks, alternating heights and using neutral or tonal candle colors like ivory, taupe, or soft sage.
- Tips and Variations: If fresh wildflowers are out of season, substitute them with dried bunny tails, pampas grass plumes, and preserved billy balls for a permanent centerpiece that requires zero maintenance.
- Design Secret: Odd numbers always look best in styling. Stick to groupings of 5 or 7 distinct brass vessels to create a visually balanced layout that draws the eye naturally from one end of the table to the other.
4. Minimalist Concrete Tray with Succulents
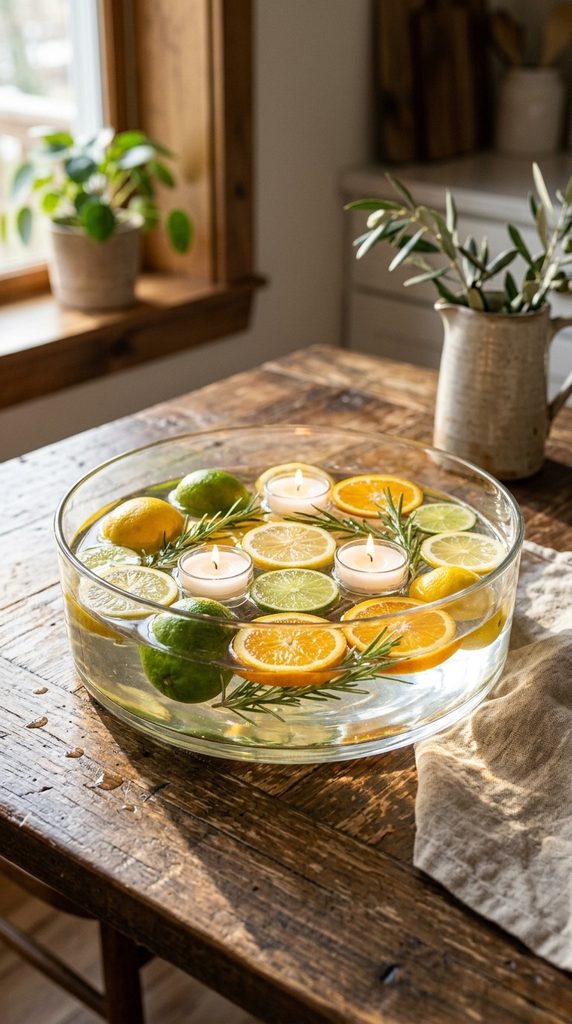
For contemporary, industrial, or urban-loft dining rooms, raw concrete paired with lush green succulents offers a striking juxtaposition of heavy industrial texture and delicate living art.
- Supplies Needed: A shallow rectangular or oval concrete tray (store-bought or handmade using a silicone mold and casting cement), a selection of assorted small succulents in 2-inch nursery pots, cactus soil, decorative white pebble stones, and preserved reindeer moss.
- Step-by-Step Instructions: If casting your own concrete tray, mix the cement according to the packaging, pour it into your mold, tap to release air bubbles, and let it cure for 48 hours. Once ready, line the bottom of the finished concrete tray with a shallow layer of well-draining cactus soil. Remove the succulents from their plastic nursery pots and arrange them snugly inside the tray, playing with different leaf shapes, heights, and purple-green color tones. Fill any remaining gaps with fresh cactus soil. Top the soil surface with a neat layer of white pebble stones and small patches of green reindeer moss to finish the clean, polished look.
- Tips and Variations: Water the succulents sparingly every two weeks using a precision squeeze bottle, ensuring the concrete tray doesn’t remain waterlogged. For a desert sunset theme, incorporate peachy-toned succulents like Graptopetalum paraguayense.
- Placement Tip: Because of its low profile, this centerpiece allows guests seated across from each other to converse easily without craning their necks, making it ideal for dinner parties.
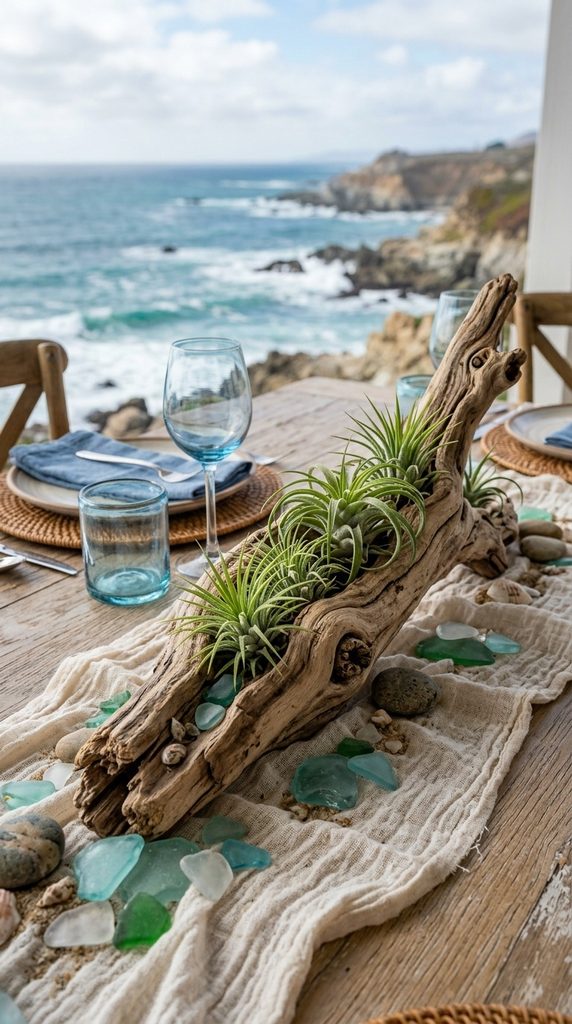
5. Coastal Driftwood and Air Plant Vignette
Evoke the serene, breezy atmosphere of a seaside retreat by combining weathered driftwood with architectural air plants and smooth sea glass.
- Supplies Needed: A large, uniquely shaped piece of weathered driftwood, 4 to 5 medium air plants (Tillandsia species), hot glue (or floral wire), smooth river stones or sea glass in soft blues and greens, and a long, narrow table runner made of unbleached cheesecloth.
- Step-by-Step Instructions: Lay the cheesecloth runner down the center of your table, gathering and twisting it slightly to create organic texture. Rest the large piece of driftwood directly in the middle of the runner. Tuck the air plants securely into the natural crevices and knots of the wood. If certain plants feel loose, secure them with a dab of warm hot glue at the very base (ensuring you do not glue the vital watering absorption pores). Scatter polished sea glass and river stones around the base of the driftwood to mimic a shoreline.
- Tips and Variations: Air plants require minimal care—simply mist them thoroughly with water once a week, or submerge them in water for 20 minutes every ten days, shaking off excess moisture before placing them back on the wood.
- Aesthetic Pairing: Complement this centerpiece with woven rattan chargers, blue-tinted glassware, and crisp white linen napkins to complete the coastal aesthetic.
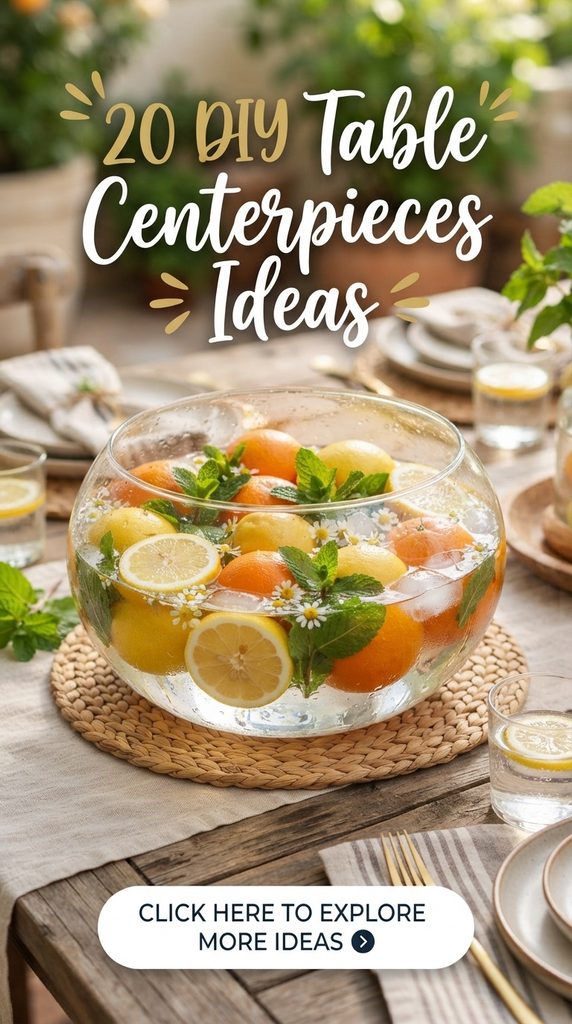
6. Floating Citrus and Herb Bowl
Vibrant, fresh, and bursting with clean, uplifting aromas, a floating fruit and herb bowl brings an energetic, sun-drenched Mediterranean feel to any dining or kitchen table.
- Supplies Needed: A wide, shallow glass or white ceramic decorative bowl, fresh citrus fruits (lemons, limes, blood oranges, and kumquats), fresh aromatic herbs (rosemary sprigs, mint, and olive branches), and floating tea light candles.
- Step-by-Step Instructions: Fill the wide bowl roughly three-quarters full with clean, cool water. Slice a few of the lemons and oranges crosswise to reveal their stunning geometric interior patterns, and leave others completely whole. Drop the whole and sliced citrus fruits into the bowl so they float freely. Tuck fresh sprigs of rosemary and olive branches in between the floating fruit. Light three small floating tea light candles and place them gently on top of the water among the fruit.
- Tips and Variations: In autumn, swap the citrus for miniature red apples, cinnamon sticks, and floating cranberries. For winter holidays, use whole pomegranates, pine sprigs, and gold-dusted walnuts.
- Sensory Benefit: As the room warms up, the natural essential oils in the citrus peels and fresh herbs release a subtle, invigorating fragrance that acts as a natural, chemical-free room freshener.
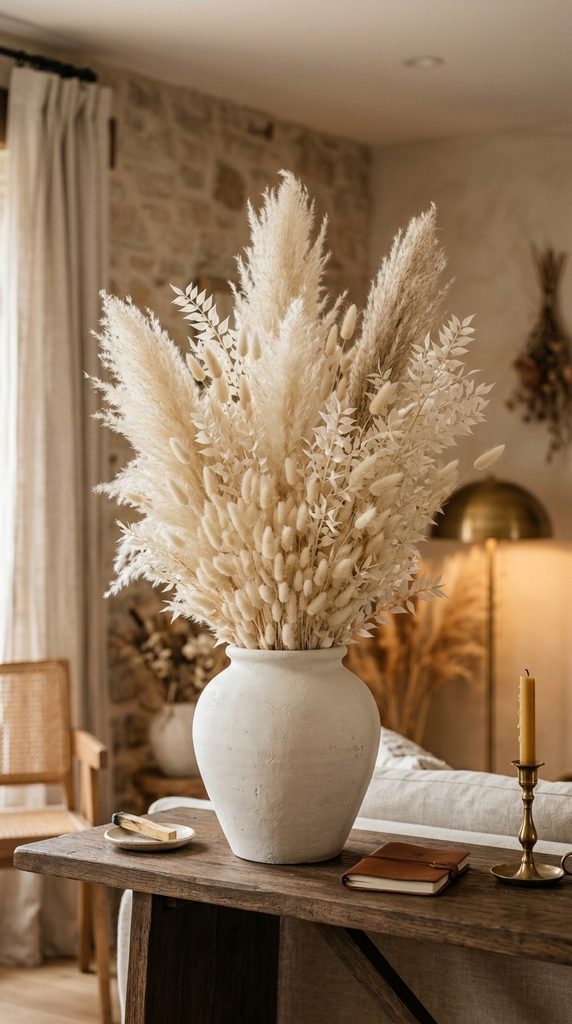
7. Monochromatic Dried Pampas and Bunny Tail Urn
Earthy, tactile, and completely maintenance-free, a dried floral arrangement offers long-lasting style with a sophisticated, high-end boho-chic appeal.
- Supplies Needed: A heavy ceramic or terracotta urn-style vase (matte white or terracotta finish), a large bundle of natural pampas grass plumes, dried bunny tails (Lagurus ovatus), preserved bleached ruscus branches, and floral foam.
- Step-by-Step Instructions: Place a block of dry floral foam tightly inside the neck of your urn vase. Begin by creating the foundational shape with the tallest pampas grass plumes, inserting them into the center and back of the foam to establish height. Layer the bleached ruscus branches outward to create width and structural movement. Finally, fill in the lower front and sides densely with fluffy bunches of bunny tails to add soft, playful texture. Trim any rogue stems with sharp floral shears until the overall silhouette looks balanced and full.
- Tips and Variations: Mist the finished pampas arrangement lightly with standard aerosol hairspray to prevent shedding over time. If you prefer a moodier look, dye the pampas grass and bunny tails in rich tones of terracotta, olive green, or charcoal gray.
- Placement Strategy: This taller centerpiece works brilliantly on large rectangular dining tables or entryway consoles where vertical height adds grandeur to the space.
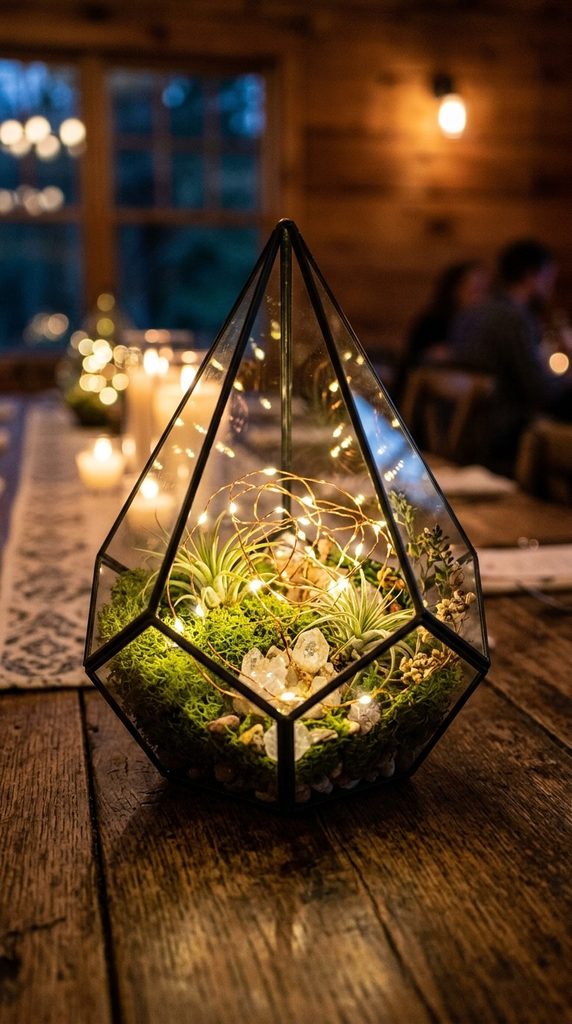
8. Geometric Terrarium Fairy Light Garden
Modern geometric glass structures combined with warm glowing fairy lights create a magical, enchanting tablescape that looks particularly stunning during evening dinner parties.
- Supplies Needed: A large black or brass geometric glass terrarium (pentagon, house, or prism shape), battery-operated copper wire micro fairy lights, preserved sheet moss, small air plants, crystals (such as clear quartz or amethyst clusters), and small pinecones or seed pods.
- Step-by-Step Instructions: Lay down a plush bed of preserved green sheet moss across the bottom interior floor of the geometric terrarium. Weave the battery-operated copper wire fairy lights artfully through the moss, tucking the battery pack discreetly behind or beneath the moss layer. Arrange your crystal clusters and air plants on top of the moss bed, creating a miniature glowing terrarium landscape. Add small decorative seed pods or tiny pinecones to finish the woodland vignette. Turn on the lights before guests sit down for dinner.
- Tips and Variations: For a romantic wedding tablescape, replace the crystals with delicate white faux pearls and tiny silk rose petals nestled among the moss and lights.
- Safety Note: Always use LED micro fairy lights rather than traditional incandescent bulbs, as they emit zero heat and pose no fire hazard when placed against moss or dried botanicals.
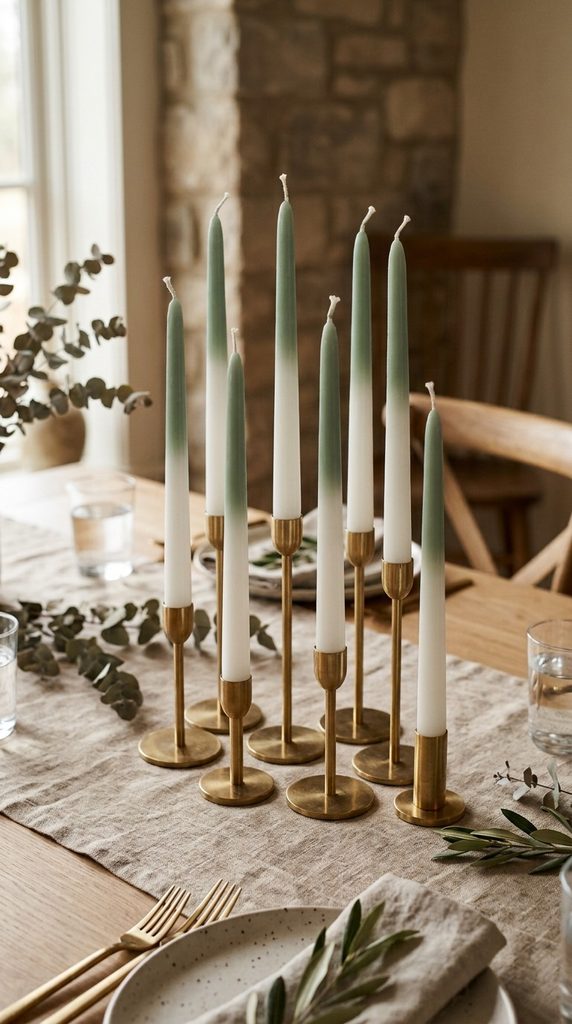
9. Ombré Dip-Dyed Taper Candle Cluster
Color theory meets minimalist design in this striking candle display. By playing with gradient tones, you create a sophisticated, artistic focal point that anchors a modern table setting.
- Supplies Needed: A set of 5 to 7 plain white unscented taper candles of varying heights, acrylic craft paint in your chosen color family (e.g., varying shades of sage green or dusty rose), a shallow container filled with water, a sponge brush, and a wooden drying rack or wire cooling grid.
- Step-by-Step Instructions: Mix your acrylic paint with a small amount of water in a shallow container to create a smooth, fluid paint bath. Hold a white taper candle by its base and submerge the top tip into the paint bath for about one inch, then pull it out slowly. To create a seamless ombré gradient, dip the candle progressively deeper into the paint bath in increments, holding it for a few seconds at each depth to build up darker color saturation at the top. Place the wet dip-dyed candles upright on a wire cooling grid or drying rack to dry completely overnight. Style them in a matching set of sleek, simple metal candleholders down the center of your table.
- Tips and Variations: Use metallic gold or copper acrylic paint for the tips to add a glamorous, festive touch for holiday dinner parties or New Year’s Eve gatherings.
- Styling Tip: Keep your table linens and dinnerware completely neutral (such as white porcelain and natural linen) to let the artistic ombré candles command all the visual attention.
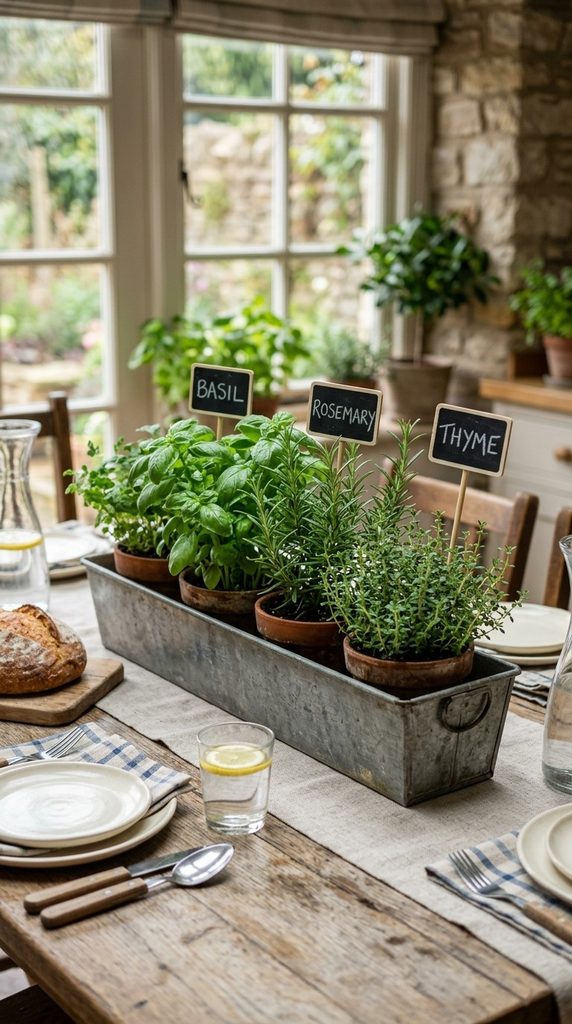
10. Farmhouse Galvanized Trough with Herb Garden
Charming, rustic, and wonderfully practical, a galvanized metal trough filled with fresh culinary herbs is the ultimate centerpiece for country-style kitchens and casual farm-to-table dinners.
- Supplies Needed: A long, narrow rectangular galvanized metal planter box or trough, 4 small potted culinary herbs (basil, thyme, rosemary, and parsley), potting soil, small chalkboard stakes, and chalk.
- Step-by-Step Instructions: Line the interior bottom of the galvanized trough with a thin layer of small pebbles to ensure proper root drainage. Remove the culinary herbs gently from their nursery containers and plant them side-by-side inside the trough, filling any empty spaces with fresh potting soil. Water the herbs lightly around their base. Write the name of each herb neatly on a mini chalkboard stake using chalk, and insert each stake directly into the corresponding plant pot.
- Tips and Variations: Keep a pair of stylish small garden snips resting right next to the trough so guests can freshly snip fragrant herbs like basil or rosemary directly onto their plates during the meal.
- After-Party Care: Once your dinner party concludes, move the galvanized trough to a sunny kitchen windowsill where the herbs can continue to thrive and grow for weeks to come.
11. Floating Water Lilies and Tealights in Glass Bowls
For an ultra-serene, zen-like tablescape, nothing compares to the tranquil beauty of floating florals and dancing candlelight reflected on water.
- Supplies Needed: Three wide, shallow glass bowls of varying diameters, fresh floating water lily blooms or large camellia blossoms, clear glass gems or polished river stones, and floating disk candles.
- Step-by-Step Instructions: Place a single layer of clear glass gems or river stones at the bottom of each shallow glass bowl to add weight and a sparkling undercurrent. Fill each bowl with clean water until it sits about one inch below the rim. Float your freshly cut water lily or camellia blossoms on the water’s surface, accompanied by a floating disk candle. Arrange the three bowls in a staggered cluster on the table. Light the candles just before guests arrive to cast a soft, shimmering glow across the room.
- Tips and Variations: Add a few drops of natural floral essential oil (like jasmine or white tea) to the water so that as the candles burn and warm the water, a subtle, beautiful fragrance fills the air.
- Maintenance Note: Ensure your flowers are freshly cut just before placing them in water; avoid getting the delicate petals of water lilies directly wet on top, as water spots can cause them to brown prematurely.
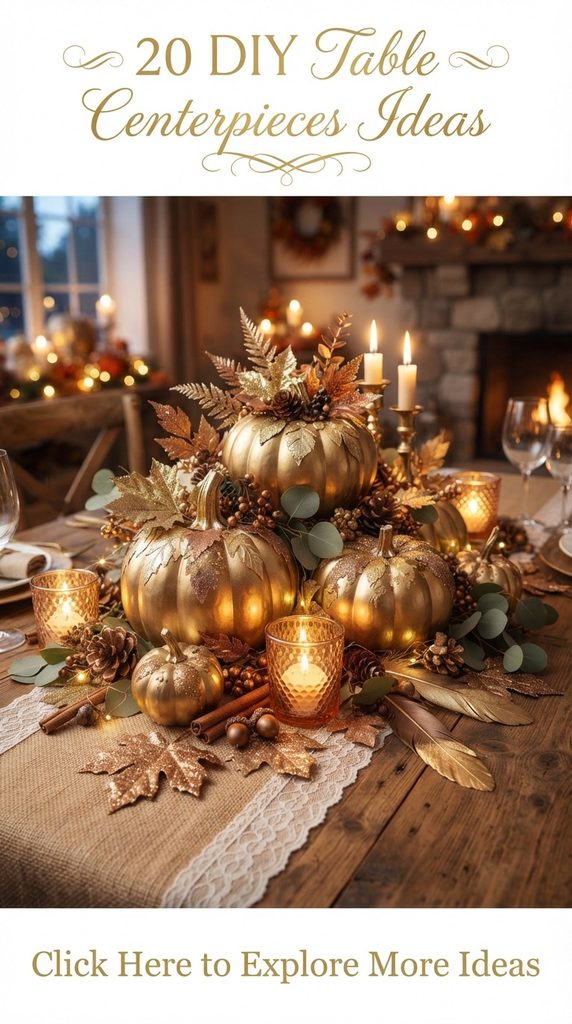
12. Moody Autumn Pumpkin and Velvet Squash Arrangement
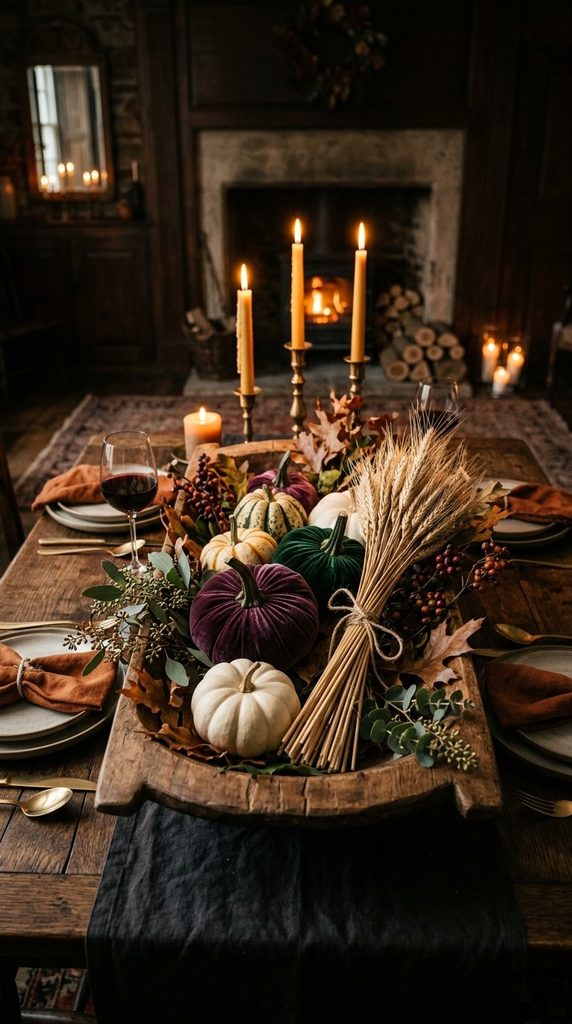
Rich textures, deep jewel tones, and seasonal bounty come together to create a luxurious, dramatic centerpiece that feels right at home during harvest season and Thanksgiving feasts.
- Supplies Needed: A long wooden dough bowl or rustic metal tray, a mix of small heirloom pumpkins, handmade velvet-covered faux pumpkins in rich colors (plum, emerald, and mustard), sprigs of seeded eucalyptus, dried wheat stalks, and bittersweet vine.
- Step-by-Step Instructions: Line the bottom of your wooden dough bowl with a soft bed of dried wheat stalks and curling bittersweet vine tendrils. Nestle your collection of real heirloom pumpkins and plush velvet pumpkins into the bowl, varying their sizes, shapes, and color tones to create visual rhythm. Tuck fresh sprigs of seeded eucalyptus and dark autumn leaves into the gaps between the pumpkins to soften the edges and add organic movement.
- Tips and Variations: Rub a tiny amount of olive oil onto the skins of real pumpkins to give them a rich, polished luster that catches the candlelight beautifully.
- Design Note: The contrast between hard, smooth natural pumpkins and soft, touchable velvet pumpkins creates an irresistible tactile element that invites guests to admire the centerpiece up close.
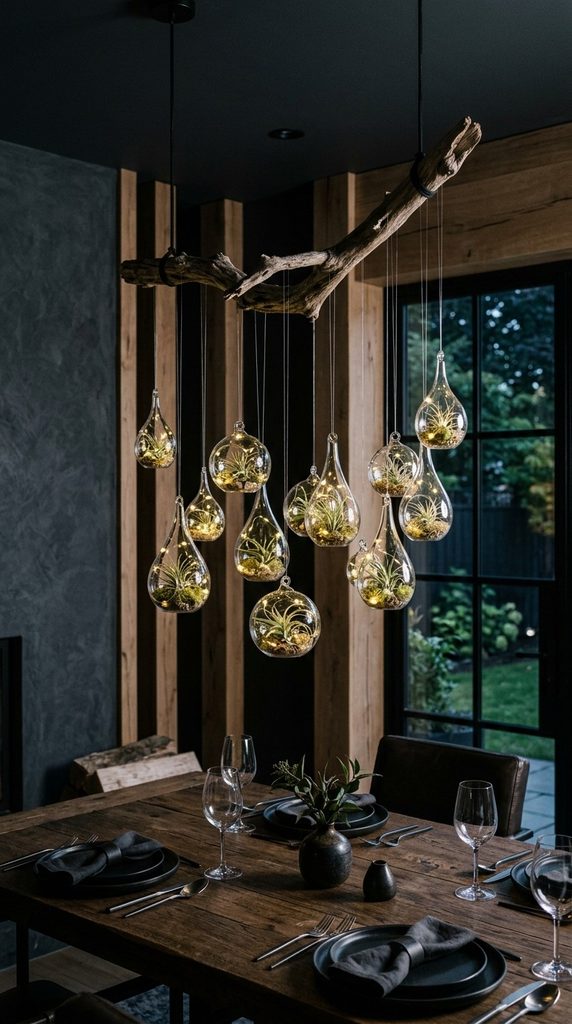
13. Minimalist Branch and Hanging Glass Orb Terrariums
Bringing architectural height and sculptural interest to the table without blocking sightlines, this suspended terrarium display makes a bold artistic statement.
- Supplies Needed: A sturdy, uniquely shaped bare branch (such as manzanita or birch, about 3 feet long), two heavy table clamps or small weighted urns to hold the branch securely, clear fishing line, several glass teardrop terrarium globes, and miniature air plants or LED tea lights.
- Step-by-Step Instructions: Securely mount your bare branch horizontally above the center of the table using discreet clamps attached to the table ends, or anchor the thick base of the branch firmly inside two heavy urns placed at opposite ends of the table. Cut varying lengths of clear fishing line. Tie one end to the top loop of each glass teardrop terrarium and secure the other end to the branch at staggered heights. Place a miniature air plant or an LED tea light inside each hanging glass orb.
- Tips and Variations: For festive winter dinners, replace the air plants with tiny pinecones and flickering battery-operated fairy lights inside the glass orbs.
- Safety Precaution: Never use real open-flame candles inside hanging glass orbs suspended near dry branches; always opt for safe, realistic flickering LED tea lights.
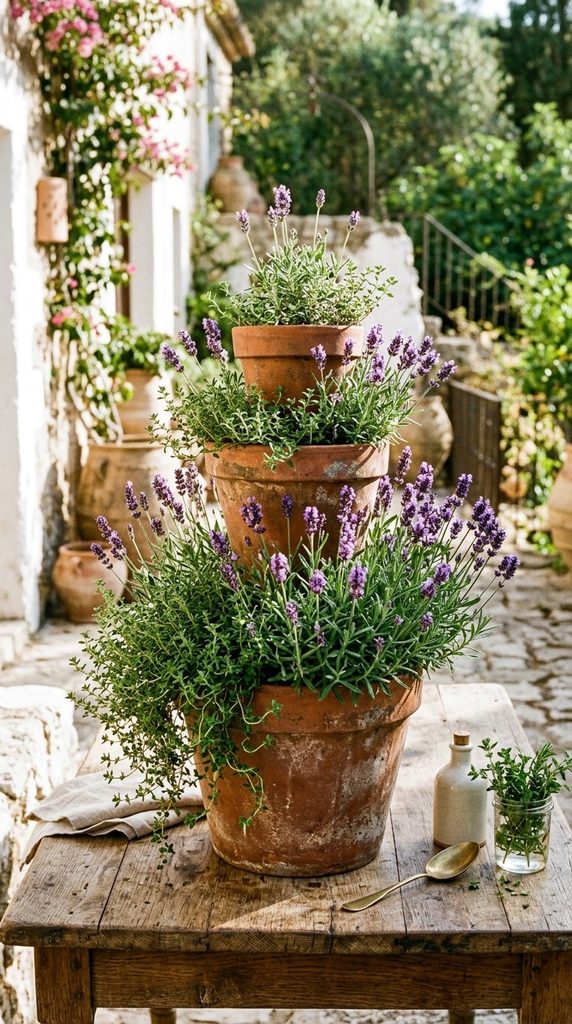
14. Terracotta Pot Herb and Lavender Pyramid
A tiered, architectural arrangement constructed from classic terracotta pots offers a rustic, Mediterranean-inspired centerpiece that smells as incredible as it looks.
- Supplies Needed: Three terracotta pots in descending sizes (e.g., 8-inch, 6-inch, and 4-inch), a sturdy wooden dowel rod (1/2 inch thick), a saucer for the base, potting soil, fresh lavender plants, and culinary thyme.
- Step-by-Step Instructions: Stand your base terracotta pot in its matching saucer. Insert the wooden dowel rod firmly into the center of the pot, anchoring it in soil or floral foam at the base. Slide the medium pot down over the dowel so it rests tilted or centered inside the large pot, filling it with potting soil. Repeat this process with the smallest pot at the top, creating a 3-tier rustic pyramid structure. Plant your fresh lavender in the upper tiers and trailing thyme in the lower tiers, watering them carefully.
- Tips and Variations: Whitewash the exterior of the terracotta pots with diluted white acrylic paint before assembly for a softer, vintage, Provençal farmhouse look.
- Aromatic Bonus: Lavender and thyme release soothing herbal aromas when brushed gently, creating a deeply relaxing sensory atmosphere for family dinners.
15. Modern Brass Hoop Floral Wreath Stand
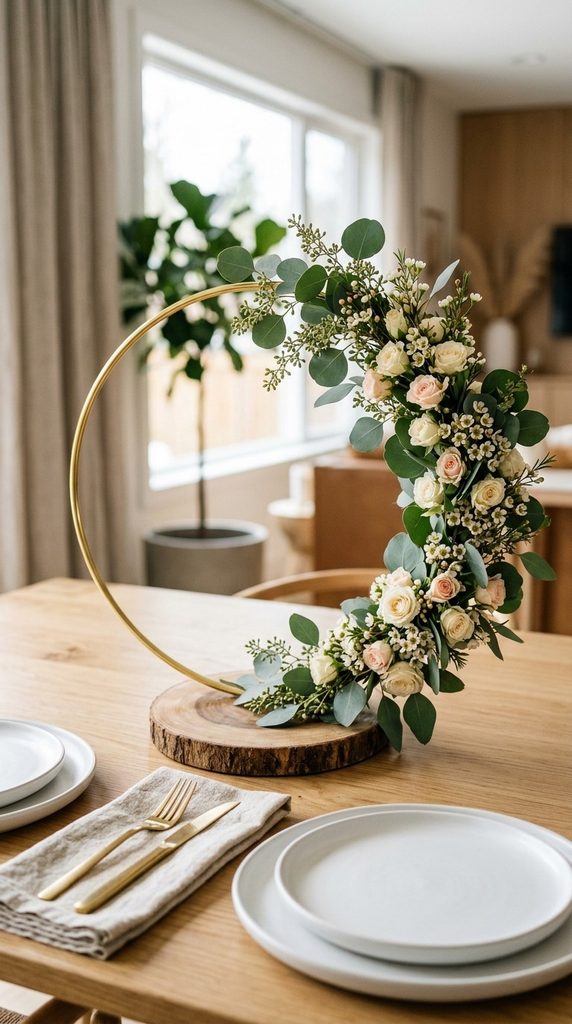
Sleek geometric metal rings adorned with asymmetric floral accents represent the pinnacle of modern wedding and interior styling trends.
- Supplies Needed: A large brass metal crafting hoop (12 to 14 inches in diameter) mounted on a small wooden block stand, floral wire, florist tape, and a selection of fresh or dried florals (such as silver dollar eucalyptus, Craspedia balls, and spray roses).
- Step-by-Step Instructions: Secure your brass hoop firmly into its wooden slot stand. Using thin green floral wire, attach a cluster of eucalyptus leaves to the bottom right quadrant of the hoop, wrapping the wire tightly around the metal frame. Layer in your accent flowers (like yellow Craspedia and spray roses), building an asymmetric floral spray that covers about one-third of the hoop while leaving the rest of the polished brass ring gorgeously exposed.
- Tips and Variations: Use dried bunny tails and preserved pampas grass instead of fresh flowers for a minimalist bohemian wreath that lasts for years without wilting.
- Styling Tip: Place a cluster of matching taper candles in brass holders directly beneath the hoop to complete a balanced, luminous tablescape.
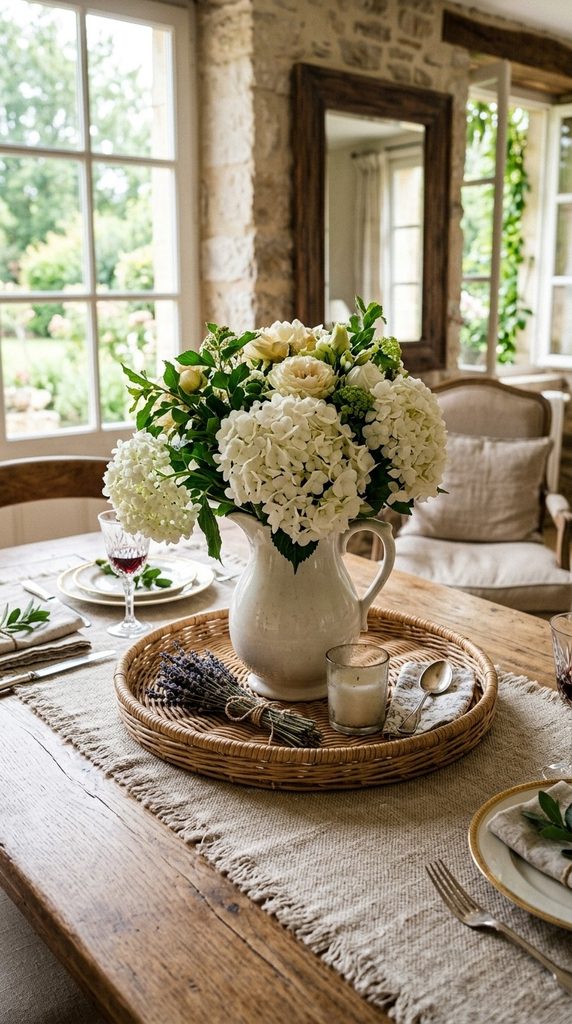
16. Rattan Tray with White Ceramic Pitcher and Florals
Effortlessly classic and reminiscent of a sunlit French country kitchen, this centerpiece relies on texture, proportion, and classic white ceramics.
- Supplies Needed: A round woven rattan or wicker serving tray, a vintage white ceramic pitcher or ironstone jug, a lush bunch of fresh white hydrangeas or garden roses, and a small linen table runner.
- Step-by-Step Instructions: Lay your woven linen table runner down the center of the dining table and place the round rattan tray right in the middle. Fill your white ceramic pitcher three-quarters full with fresh, cool water and floral preservative. Trim the stems of your white hydrangeas or roses at a 45-degree angle and arrange them loosely in the pitcher so they spill out in a full, rounded dome. Place the pitcher proudly in the center of the rattan tray, and accent the remaining tray space with a couple of rolled linen napkins or a small scented candle.
- Tips and Variations: Hydrangeas are heavy drinkers; keep a small watering pitcher nearby to top off the ceramic jug daily to keep the blooms crisp and hydrated.
- Design Appeal: This timeless arrangement bridges casual farmhouse style and sophisticated elegance, making it suitable for everything from a casual Sunday breakfast to an anniversary dinner party.
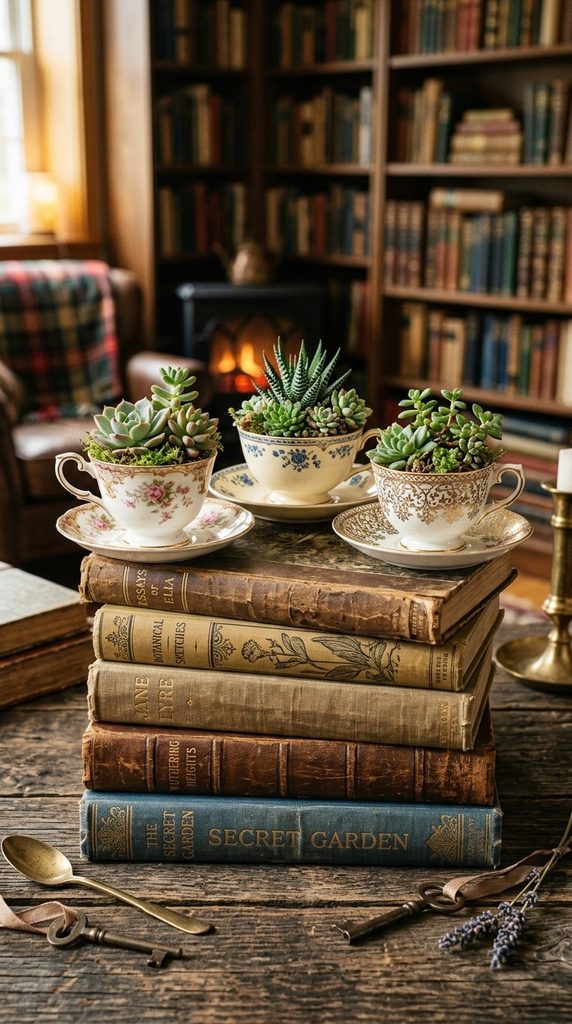
17. Vintage Book Stack with Teacup Succulent Gardens
For book lovers and vintage enthusiasts, repurposing old hardcover books into a botanical display is a uniquely creative way to add charm and history to your tablescape.
- Supplies Needed: A stack of 3 to 4 vintage hardcover books with beautiful, weathered cloth or leather spines, 3 vintage porcelain teacups with matching saucers, small succulent cuttings or rooted plantlets, and potting soil.
- Step-by-Step Instructions: Lay the vintage books flat in a staggered stack on the center of your table, facing the spines outward so their titles and aged textures are visible. Fill each vintage teacup gently with a small amount of moist potting soil. Plant a small succulent cutting or rooted rosette snugly into each teacup. Place the planted teacups on top of the book stack, alongside one or two closed vintage hardcovers standing upright as bookends.
- Tips and Variations: Tie a piece of rustic twine or faded velvet ribbon around the book stack to tie the vintage aesthetic together.
- Care Tip: Water the teacup succulents very sparingly using a dropper or spoon once a week to ensure water doesn’t spill over the edges onto the vintage book covers.
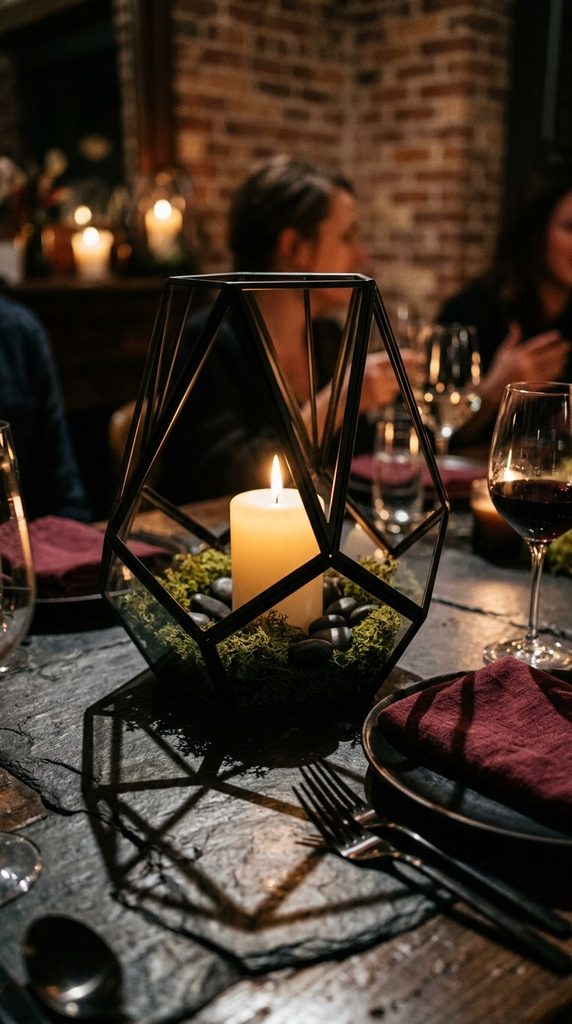
18. Geometric Prism Lantern with Moss and Pillar Candle
Striking, architectural, and moody, a black metal prism lantern creates dramatic shadows and warm ambient lighting when paired with natural organic elements.
- Supplies Needed: A modern black wire or glass prism lantern, a thick ivory pillar candle, preserved forest green moss, and a scattering of polished river stones or pinecones around the base.
- Step-by-Step Instructions: Place your black metal prism lantern directly in the center of the table. Open the latch or door of the lantern and place the thick ivory pillar candle securely in the center of the floor. Pack preserved forest green moss tightly around the base of the candle inside the lantern, letting a few tufts spill slightly out of the geometric framework. Scatter a few polished river stones or tiny pinecones around the exterior base of the lantern to anchor it to the tabletop.
- Tips and Variations: Replace the pillar candle with a battery-operated LED candle equipped with a remote control so you can easily turn the centerpiece on and off without opening the lantern glass.
- Aesthetic Pairing: Pair this lantern with matte black flatware, dark slate charger plates, and deep burgundy cloth napkins for a dramatic, moody dinner party table.
19. Wooden Box with Succulents and Air Plants
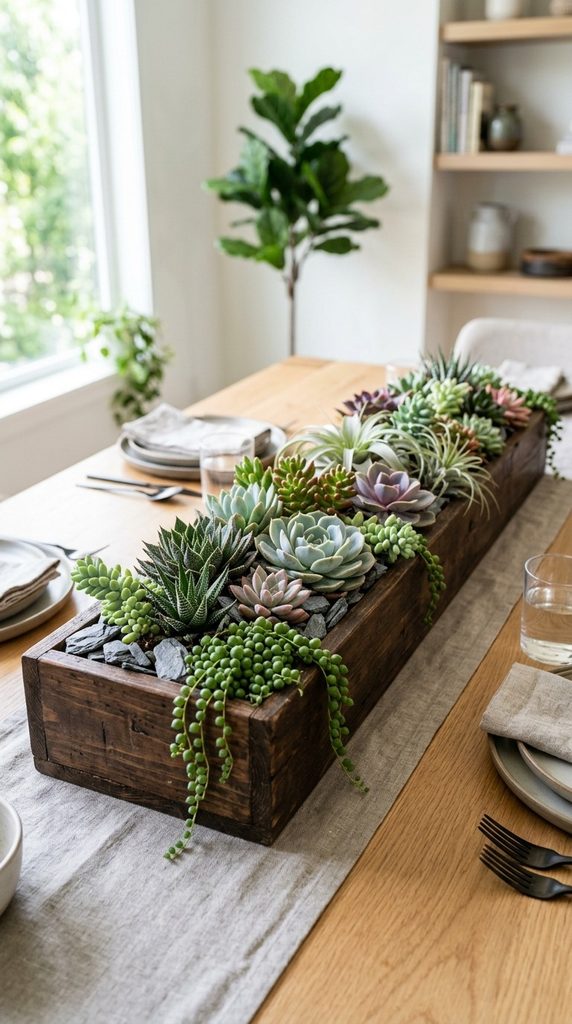
A low-profile wooden planter box packed with a diverse mix of drought-tolerant plants creates a lush, natural living runner that suits contemporary and rustic homes alike.
- Supplies Needed: A long, narrow rectangular wooden planter box (stained dark walnut or weathered gray), a mix of varied succulents, tillandsia air plants, cactus soil, and decorative grey slate chips.
- Step-by-Step Instructions: Fill the interior of the wooden box with well-draining cactus soil up to one inch below the rim. Plant your assorted succulents in neat rows or organic clusters, mixing rosette forms with trailing varieties. Nestle a few air plants and smooth grey slate chips between the planted succulents to add varied height and mineral texture. Clean any stray soil specs from the wooden exterior with a soft brush.
- Tips and Variations: Burnish the wooden box with a coat of beeswax polish to protect the wood from moisture and bring out a rich, satin grain finish.
- Maintenance Benefit: Because succulents and air plants require very little water, this centerpiece can remain on your dining table for months with minimal upkeep, making it a wonderful semi-permanent home decor fixture.
20. Minimalist Branch and Glass Votive Runner
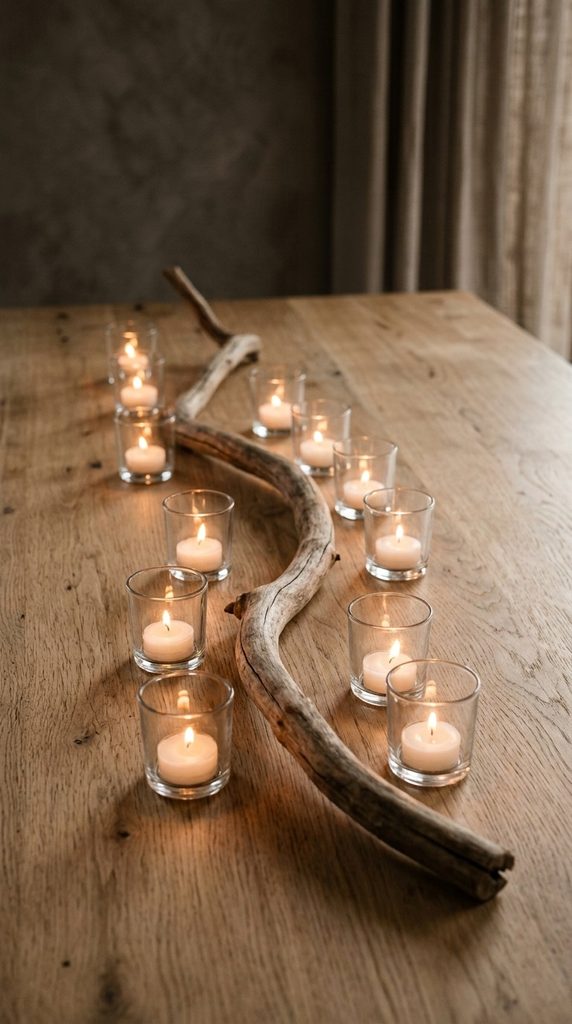
Simplicity at its finest, this airy centerpiece celebrates negative space, organic movement, and the pure, flickering magic of candlelight.
- Supplies Needed: A long, curving natural branch (pruned clean of leaves), a set of 6 to 8 clear glass votive candle holders, and tealight candles (real or LED).
- Step-by-Step Instructions: Lay your curving natural branch lengthwise down the exact center of your dining table, letting its organic curves dictate the line. Space your clear glass votive holders evenly along both sides of the branch, weaving them in and out of the wooden curves. Insert a tealight candle into each glass votive holder and light them just as dusk settles. The low flame casting light against the raw wood grain creates an intimate, calming atmosphere.
- Tips and Variations: Spray paint the natural branch in matte gold or metallic silver for an elegant holiday tablescape or winter solstice dinner party.
- Design Philosophy: Proving that less is often more, this centerpiece relies entirely on negative space and warm lighting to make a sophisticated design statement without cluttering the table.
More ideas to come in future addition.