1. Etched Glass Constellation Lanterns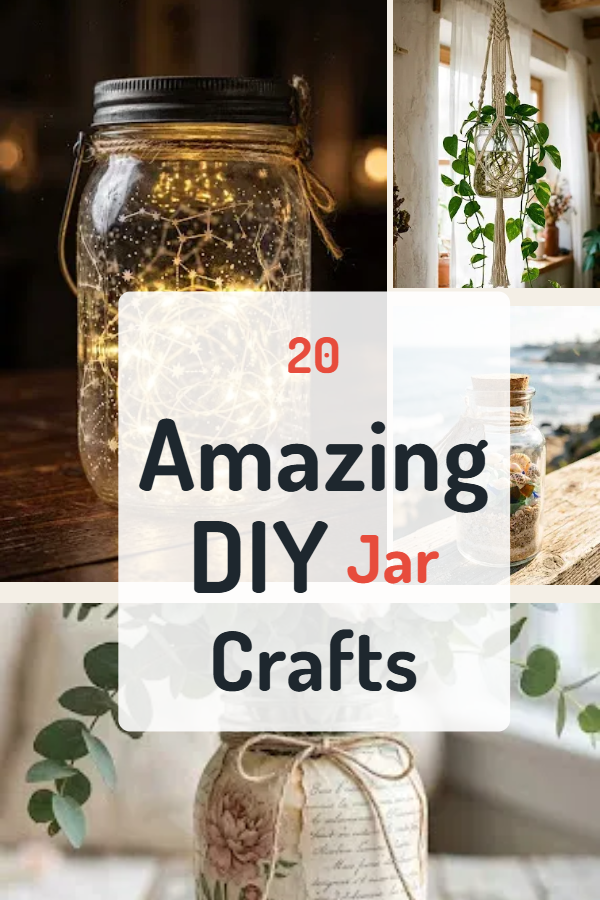
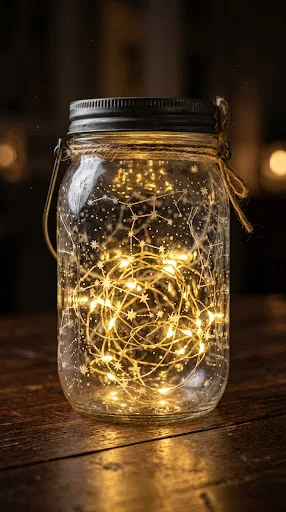
Transforming a plain mason jar into a glowing celestial masterpiece is one of the most mesmerizing projects you can undertake. Etched glass constellation lanterns bring the quiet magic of a clear night sky directly onto your bedside table or patio railing. By applying a specialized glass etching cream over custom stencils, you permanently carve delicate star maps, zodiac signs, and twinkling galaxy clusters into the surface of the glass. When a warm light source sits inside, the etched areas diffuse the glow softly while the surrounding clear glass maintains a crisp contrast, casting ethereal starlight patterns across your room.
To begin this project, gather a set of smooth-sided glass jars, glass etching cream, small foam brushes, vinyl star stickers, and a fine-tip painter’s tape. Clean your jars thoroughly with rubbing alcohol to remove any oils or dust that might interfere with the chemical etching process. Carefully place your star stickers and line drawings onto the outer surface of the jar to map out recognizable constellations like Orion, Ursa Major, or Cassiopeia. You can use tiny dot stickers for individual stars and thin strips of vinyl tape to connect them into celestial shapes.
Once your stencil design is firmly adhered, apply a thick, even layer of glass etching cream over the entire exterior using your foam brush. Follow the safety and timing instructions on your etching cream bottle, usually letting it sit for about five to ten minutes. Rinse the cream off under warm running water, peel away the vinyl stickers, and wash the jar with soap. Insert a battery-operated fairy light strand or a flameless LED tealight to bring your personal starry night to life with a cozy, romantic ambiance.
2. Pressed Wildflower Apothecary Bottles
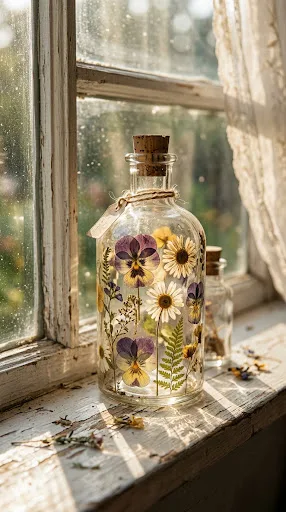
There is a timeless, romantic aesthetic associated with vintage apothecary jars filled with botanical specimens. Pressed wildflower apothecary bottles capture the fleeting beauty of spring and summer blossoms, preserving them indefinitely behind clear, protective glass. This craft allows you to forge a deep connection with nature as you forage for small petals, delicate ferns, and tiny field blossoms, turning simple glassware into vibrant art pieces that suit bohemian, rustic, or minimalist home decor styles effortlessly.
Start by collecting small flowers and foliage during a sunny afternoon walk. Look for specimens with flat profiles, such as pansies, daisies, buttercups, baby’s breath, and small fern fronds. Press your botanical finds between sheets of parchment paper inside a heavy book for about one to two weeks until they are completely dry and flat. Select glass jars with clean lines and classic stoppers or cork lids to accentuate that old-world apothecary feel.
Using a pair of fine tweezers, carefully apply a minuscule dab of clear-drying decoupage medium or clear craft glue to the back of each pressed flower. Gently press the blossoms onto the outer or inner surface of the jar, creating artistic cascades, floating meadows, or organized botanical grids. Once the glue dries completely, apply a thin, protective topcoat of decoupage sealer over the exterior to guard against moisture and UV fading. Display these floral treasures on a sunny windowsill where natural light can filter through the delicate, translucent petals.
3. Distressed Coastal Sea Glass Vases
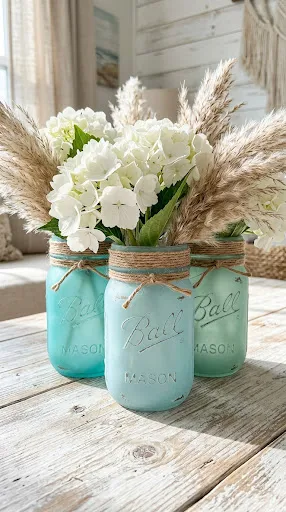
If you long for the soothing sound of ocean waves and the sun-bleached charm of coastal living, distressed sea glass vases offer an effortless way to bring seaside tranquility indoors. This project uses translucent frosted spray paints and gentle distressing techniques to replicate the weathered, matte texture of genuine sea glass found along sandy shores. The finished jars make stunning centerpieces for coastal weddings, summer dining tables, or serene bathroom vanities filled with fresh blooms or dried pampas grass.
To recreate this oceanic finish, select jars of varying shapes and heights, such as old sauce jars, pickle containers, or standard mason jars. Clean the glass thoroughly and spray the exterior with a thin, even layer of sea-glass-textured spray paint in cool coastal shades like aqua blue, sage green, frosted turquoise, and soft seafoam. Allow the first coat to dry completely before applying a second light coat to achieve a balanced, semi-translucent frosted appearance.
Once the paint has cured for a few hours, take a piece of fine-grit sandpaper or a damp micro-abrasive sponge and gently rub around the raised rims, ridges, and threading of the jar. This subtle distressing technique exposes bits of clear glass beneath, mimicking the authentic wear and tear caused by ocean waves hitting sand and rock. Wrap natural jute twine, raw linen ribbons, or tiny polished seashells around the neck of the jar to complete the laid-back, coastal aesthetic.
4. Metallic Mercury Glass Candle Holders
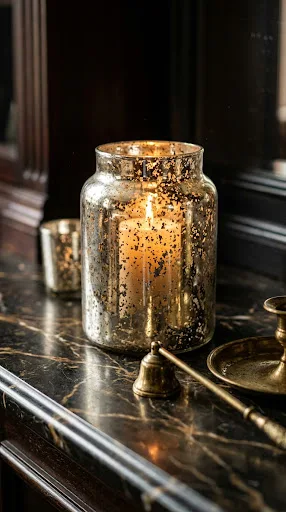
Mercury glass exudes an unmistakable sense of vintage luxury, drama, and old-world elegance. Authentic antique mercury glass can be quite expensive, but you can easily duplicate its iconic, mottled silvery glow on everyday glass jars using a clever blend of mirror spray paint and diluted vinegar. These shimmering candle holders reflect candlelight in mesmerizing, glittering patterns, making them an ideal project for holiday decorating, intimate dinner parties, or adding a touch of glamour to your mantelpiece.
Begin with perfectly clean glass jars that have smooth interiors. Mix equal parts water and white distilled vinegar in a small misting spray bottle. Lightly spray the *inside* of your glass jar with the water-vinegar solution so that fine droplets bead up along the glass walls. Immediately follow up by spraying a thin coat of silver mirror-finish spray paint directly into the interior of the jar, covering the wet droplets.
Allow the paint to react with the liquid droplets for about a minute, then take a soft, dry paper towel and gently dab at the interior. The vinegar beads will lift away small circles of paint, creating the signature distressed, speckled look characteristic of antique mercury glass. Repeat this misting, spraying, and dabbing process two or three times until you achieve your desired opacity. Place a real or battery-operated tealight inside, and watch the flickering candle light dance through the metallic dappled surface.
5. Rustic Farmhouse Chalkboard Herb Planters
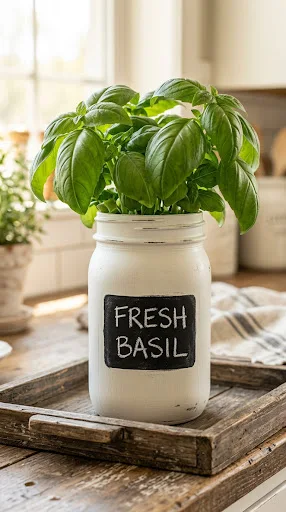
Bringing fresh culinary herbs into your kitchen elevates both your cooking and your interior decor. Rustic farmhouse chalkboard herb planters combine functional home gardening with charming, vintage-inspired design. By painting individual mason jars with matte chalk paint and featuring custom erasable labels, you can cultivate a thriving indoor herb garden right on your kitchen windowsill while keeping your basil, mint, oregano, and rosemary neatly organized and beautifully displayed.
To build your indoor herb sanctuary, start by applying two coats of matte black chalkboard paint to a wide section on the front of each jar, or cover the entire jar in warm neutral shades like cream, linen, or sage before adding a chalkboard label rectangle. Once the paint is fully cured, condition the chalkboard surface by rubbing the side of a piece of chalk all over it and wiping it clean with a dry cloth. Use liquid chalk markers to write the names of your herbs in elegant typography.
Because glass jars lack drainage holes at the bottom, proper soil layering is essential for long-term plant health. Fill the bottom inch of each jar with small drainage pebbles, gravel, or horticultural charcoal to absorb excess water and prevent root rot. Layer high-quality potting soil over the gravel, plant your favorite fresh herb seedlings, and water them lightly. Arrange your labeled jar garden on a wooden tray or mount them onto a reclaimed wood board for a striking vertical herb wall.
6. Terrarium Fairy Garden Escapes
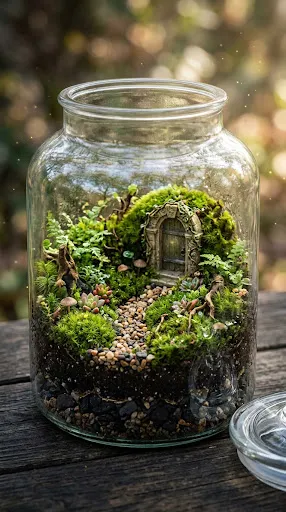
Step into a realm of miniature magic by turning large glass jars into self-contained terrarium fairy gardens. This whimsical craft appeals to kids and adults alike, offering a creative canvas to build tiny, enchanted landscapes complete with lush moss, miniature succulents, tiny pebble pathways, and fairy figurines. Glass jar terrariums function as living art installations that require minimal maintenance while adding a captivating touch of greenery and fantasy to any desk or bookshelf.
Select a wide-mouthed jar, such as a large apothecary jar, a vintage pickle crock, or a 64-ounce mason jar, to ensure you have ample room to work inside. Build a functional terrarium ecosystem starting with a bottom drainage layer of aquarium gravel or lava rocks, followed by a thin layer of activated charcoal to keep the air inside fresh and prevent mold growth. Top the charcoal with a rich layer of terrarium potting soil customized for your chosen plants.
Carefully plant slow-growing, low-moisture plants like miniature ferns, fittonia, mosses, or small succulents using long wooden tweezers or chopsticks. Add fine decorative sand to craft miniature winding pathways, and place tiny river stones to mimic rocky outcrops. Complete the whimsical scene with tiny fairy doors, mini resin mushrooms, and delicate figurines. Place your mini ecosystem in indirect sunlight and mist gently whenever the soil feels dry to the touch.
7. Boho Macramé Hanging Plant Holders
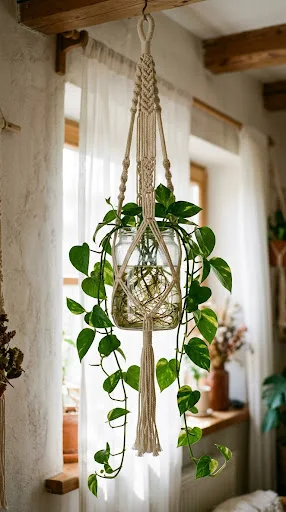
Combine the warm, tactile textures of fiber art with practical home greenery by creating boho macramé hanging jar holders. Freeing up valuable counter and shelf space, these hanging displays allow you to suspend propagation cuttings, trailing vining plants, or flickering candles in front of windows and in empty room corners. The combination of twisted cotton cord knotwork and smooth, transparent glass radiates a relaxed, bohemian vibe that brightens up any living space.
You will need a glass jar with a distinct lip or rim around the top, natural 3mm or 4mm cotton macramé cord, and wooden mounting rings. Cut four equal lengths of cord (usually about six to eight feet long) and attach them to a top wooden ring using lark’s head knots. Divide your cords into pairs and begin tying series of square knots, spiral knots, or simple overhand knots at measured intervals down the length of the cords, forming an open mesh net that will securely cradle your jar.
Place your glass jar in the center of the woven cord basket, pulling the cords taut around the base and sides to verify that it sits balanced and secure. Tie a heavy knot at the bottom underneath the base of the jar, leaving a decorative fringe tassel dangling below. Fill your jar with fresh water to propagate houseplant cuttings like pothos or monstera, or place a pillar candle inside to turn your hanging macramé vessel into a floating evening lantern.
8. Bohemian Mosaic Stained Glass Lanterns
Infuse your living area with rich, jewel-toned color and radiant pattern through bohemian mosaic stained glass lanterns. Using colorful stained glass mosaic tiles, crushed glass, or translucent glass beads bonded directly onto plain jars, you can construct stunning light catchers that project kaleidoscopic patterns across your walls when illuminated. This tactile, artistic project allows for endless geometric or abstract pattern designs, turning budget-friendly glassware into heirloom-quality mosaic art.
Gather an assortment of colorful glass mosaic tiles, stained glass scraps, glass gems, and clear silicone adhesive or strong mosaic craft glue. Clean your glass jar thoroughly and plan your design on paper first—popular motifs include mandala stars, geometric diamonds, or freeform organic waves. Working in small sections, apply a dab of adhesive to the back of each mosaic piece and press it firmly onto the glass, leaving tiny, uniform gaps between each tile for the grout.
Once the adhesive has cured completely for 24 hours, mix a small batch of premixed sandy tile grout in a complementary tone such as charcoal, off-white, or terracotta. Spread the grout generously over the entire mosaic surface using a rubber float or gloved hands, pressing the mixture deep into all the crevices. Wipe away excess grout with a damp sponge, let it dry until a haze forms, and buff the glass tiles sparkling clean with a microfiber cloth. Put an LED light inside and enjoy the radiant display.
9. Cozy Knitted Jar Candle Warmers
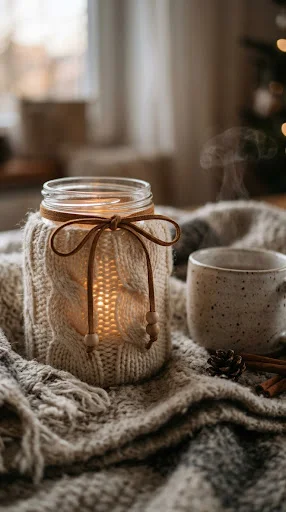
When the cold autumn and winter months arrive, nothing feels more inviting than soft, textured textiles and warm candlelight. Cozy knitted jar candle warmers wrap standard glass jars in hand-knitted or crocheted sleeves, transforming ordinary glass containers into charming, hygge-inspired sweater lanterns. The open weave of the yarn allows soft rays of warm candlelight to filter through the knitted stitches, casting intricate shadow patterns and bringing cozy warmth to your living room or bedroom.
If you knit or crochet, measure the circumference and height of your jar to craft a custom-fitted sleeve. Simple stitch patterns like ribbed stitch, cable knit, moss stitch, or openwork mesh stitch work exceptionally well, providing texture and letting maximum light pass through. Choose soft yarns in natural, neutral hues like cream, oat, charcoal, or soft blush to maintain a timeless, Scandinavian aesthetic. Alternatively, you can upcycle the sleeves of an old, worn-out wool sweater by cutting them to size and hemstitching the raw edges.
Slide your custom fabric sweater snugly onto the jar from the bottom up, ensuring it fits flush against the glass rim. Tie a piece of rustic suede cord, natural jute twine, or a silk ribbon around the neck of the jar, finishing it off with two small wooden beads or tiny jingle bells. For safety, always use flameless LED tea lights or battery-operated pillar candles inside textile-wrapped jars to eliminate fire risks while enjoying a warm, textured glow.
10. Layered Bath Salt & Scrub Spa Jars
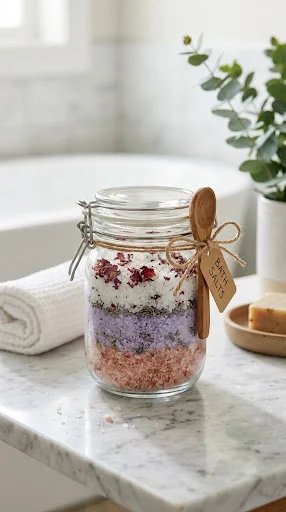
Indulge in a luxurious home spa experience or create stunning, pampering gift sets with layered bath salt and scrub spa jars. By carefully layering different colored and scented Epsom salts, dead sea salts, pink Himalayan salts, and herbal additions into clear glass jars, you create a visual treat that looks like a high-end apothecary product. These customized bath jars promote relaxation, muscle recovery, and skin hydration while looking gorgeous sitting on your bathroom vanity shelves.
To craft these visually striking spa jars, start by dividing plain Epsom salt and coarse sea salt into three or four mixing bowls. Scent each bowl with therapeutic-grade essential oils—such as soothing lavender, refreshing eucalyptus, or invigorating sweet orange. Tint the salt in each bowl with a few drops of natural mica powder or food coloring, creating a harmonious gradient palette (like ombré pinks, serene ocean blues, or calming herbal greens). Mix in dried botanical elements like lavender buds, rose petals, or chamomile flowers.
Using a funnel or wide spoon, carefully layer the contrasting scented salts into a clear glass jar with a tight-fitting cork stopper or latch lid. Angle the jar slightly between layers to create dynamic, wavy strata patterns inside the glass. Top the final layer with a scatter of dried blossoms. Attach a mini wooden spoon around the neck of the jar using natural jute cord, along with a handwritten tag detailing the natural ingredients and instructions for a soothing soak.
11. Vintage Photo Liquid Snow Globes
Preserve your most cherished memories in a novel, nostalgic way by creating vintage photo liquid snow globes out of glass jars. Floating precious family photographs, vintage portraits, or vacation snapshots inside liquid-filled jars infused with metallic glitter gives photographs a dreamy, suspended depth. This heartfelt craft makes an exceptional personalized gift for anniversaries, holidays, or memorial keepsakes, bringing classic photographic memories into dynamic, shimmering physical form.
Select a clear glass jar with a secure, leak-proof screw-top lid. Print your chosen photograph onto photo paper, then laminate it thoroughly using a thermal laminator to ensure it is 100% waterproof. Trim around the laminated border, leaving a tiny plastic edge around the photo to prevent water from seeping into the paper interior. Hot glue the bottom edge of the laminated photo securely to the interior underside of the jar lid, reinforced with waterproof silicone sealant.
Fill the glass jar almost to the brim with distilled water, adding a few drops of liquid glycerin or clear baby oil—this increases the liquid’s viscosity so the glitter floats down slowly when shaken. Stir in a generous pinch of fine white or iridescent metallic glitter and small star sequins. Screw the lid (with the photo attached) tightly onto the jar, sealing the inner threads with clear silicone glue to prevent leaks. Turn the jar upside down and watch your memories swirl in a glittering wonderland.
12. Midnight Celestial Galaxy Jars
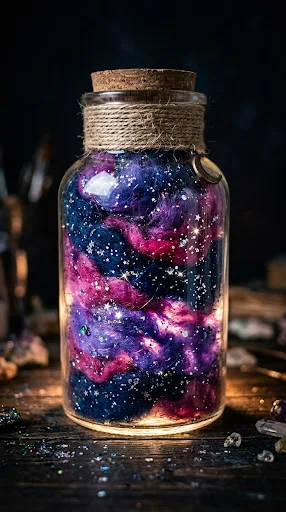
Capture the infinite beauty of deep space within the confines of a glass container by crafting midnight celestial galaxy jars. Using layered cotton balls, colorful metallic paints, liquid dye, and fine glitter, you can build shimmering multi-colored cosmic nebulae that look like swirling galaxies trapped inside glass. This mesmerizing project is immensely popular with teenagers, kids, and astronomy enthusiasts, serving as a soothing sensory bottle and an eye-catching nightstand display piece.
To construct your personal cosmos, fill the bottom of a tall glass jar with a thin layer of unrolled cotton balls or polyester fiberfill. In a separate cup, mix water with dark blue or violet acrylic paint or liquid food dye until deeply saturated. Pour the colored water over the cotton layer until it absorbs the liquid completely. Sprinkle a generous amount of fine silver glitter and holographic star sequins over the wet cotton to represent distant star fields.
Repeat this layering process, changing the paint colors for each layer—transitioning from deep navy blue to vibrant magenta, electric pink, teal, and deep purple. Use a long craft stick to gently poke and swirl the edges of the cotton layers along the inner glass walls, creating realistic, cloud-like space nebula formations where the colors blend into one another. Fill the jar to the top, seal the lid tightly, and admire your swirling personal universe under bright light.
13. Frosted Winter Village Luminaries
Transform plain glassware into magical winter wonderlands with frosted winter village luminaries. By applying a silhouette stencil of small evergreen trees, cozy cabins, and deer around the base of a jar and coating the glass in artificial faux snow and frosted glass spray, you create a cozy storybook scene. When lit from within, the cut-out silhouettes stand out sharply against a soft, glowing, snowy backdrop, bringing festive warmth to long winter evenings.
Start by cutting out silhouettes of pine trees, tiny chalets, and woodland animals from black or dark blue vinyl or cardstock paper. Stick these silhouette shapes around the bottom perimeter of a clean glass jar. Apply a coat of frosted glass spray paint over the entire exterior of the jar, or brush on liquid decoupage medium and generously roll the jar in white Epsom salt, mica flakes, or artificial snow to form a shimmering, textured frost layer.
Carefully peel away the vinyl silhouettes while the paint or glue is slightly damp, revealing clear glass windows shaped like your woodland scene. Dab extra glue around the rim of the jar and sprinkle more faux snow to look like freshly fallen powder capping the vessel. Drop a warm LED tealight or a string of battery-operated fairy lights inside. As the light flickers, your snowy winter village will glow softly like a quiet, snow-covered forest town.
14. Industrial Pipe Wall Sconce Jars
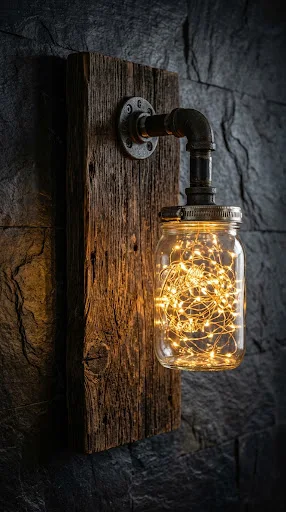
If your home aesthetic leans toward rustic, industrial, or modern farmhouse, industrial pipe wall sconce jars offer the perfect blend of rugged materials and cozy, functional lighting. By mounting mason jars onto stained wooden plaques using black iron plumbing pipes and metal hose clamps, you build striking wall-mounted sconces that elevate hallways, entryways, or living room accent walls with warm, rustic character.
Begin by cutting and sanding two rectangular wooden boards from reclaimed barn wood or pine lumber. Stain or paint the wood in a deep walnut, weathered gray, or warm mahogany finish, allowing the natural wood grain to shine through. Attach a heavy-duty sawtooth picture hanger to the back of each board. Next, paint metal hose clamps or iron pipe fittings in a matte black or oiled bronze finish to give them an authentic vintage industrial look.
Secure the metal hose clamp to the upper center of your stained wooden board using a heavy wood screw. Place the neck of your glass jar into the open clamp and tighten the screw until the jar is held firmly in place against the plaque. Fill the bottom of the jar with decorative stones, dried botanicals, or simply coil a warm-white LED battery-operated string light inside, hiding the battery box behind the wood board for a clean, cordless installation.
15. Terracotta Faux Ceramic Flower Pots
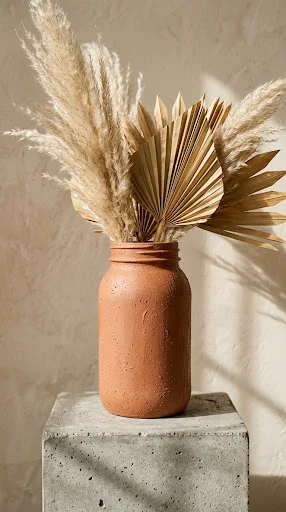
If you love the organic, earthy texture of matte terracotta pottery and modern minimalist ceramics, this craft converts basic glass jars into stylish faux-ceramic vases using basic kitchen ingredients. Mixing acrylic paint with baking powder creates a thick, textured, matte paint mixture that completely covers slippery glass, giving it the exact look and tactile feel of handcrafted stoneware clay without needing a pottery wheel or kiln.
To create your faux ceramic finish, mix two parts matte acrylic paint (in organic tones like terracotta, warm ochre, sand, beige, or plaster white) with one part baking powder in a disposable container. The mixture will puff up and react, creating a fluffy, thick paint texture. Using a stiff, flat paintbrush, apply the mixture to the exterior of your glass jar in broad, deliberate strokes. You can paint in vertical sweeps, horizontal bands, or arched patterns to add dimensional interest.
Allow the first thick layer to dry completely for about two to three hours before applying a second coat to ensure complete coverage over the glass. Once the paint is thoroughly dry, it hardens into a matte, slightly chalky, textured surface indistinguishable from real unglazed ceramic pottery. Style your faux ceramic jars with dried palm spears, fluffy pampas grass, or faux eucalyptus stems to instantly elevate your coffee table or bookshelf styling.
16. Decoupage Vintage Botanical Vases
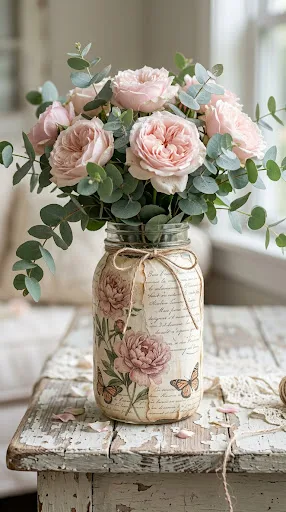
Decoupage is a time-honored craft technique that allows you to transfer intricate illustrations and graphic prints onto 3D surfaces seamlessly. Decoupage vintage botanical vases use classic art prints—such as vintage floral illustrations, antique butterfly charts, vintage maps, or delicate French script paper—to wrap plain glass jars in timeless artistic charm, creating breathtaking vases for fresh-cut garden flowers.
Select your favorite printed images on thin paper, such as rice paper, decorative napkins, or printed tissue paper, as thinner papers blend into glass surfaces more seamlessly. Trim your paper design to size, or tear the edges gently with your fingers to produce a soft, feathered border that melts onto the glass. Clean the glass jar thoroughly with alcohol to ensure proper adhesion.
Brush a generous, even layer of matte decoupage glue over the outer surface of the jar. Carefully lay your paper print onto the sticky surface, starting from the center and working outward using a soft craft sponge or dry brush to smooth out air bubbles and wrinkles. Allow it to dry completely, then seal with two additional protective coats of decoupage finish. Finish the jar neck with a tied velvet ribbon or vintage lace trim for an added touch of romantic elegance.
17. Seashell & Sand Coastal Memory Keepers
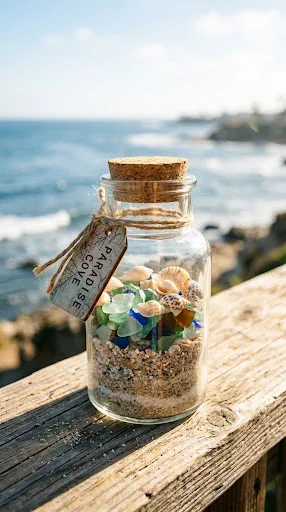
Vacations to the beach leave us with cherished memories and pockets full of collected ocean treasures. Seashell and sand coastal memory keepers provide a creative, organized way to display souvenirs from special seaside trips instead of leaving them tucked away in bags. These decorative memory jars serve as mini time capsules that display local beach sand, sea glass, small driftwood pieces, and delicate seashells from your favorite coastal vacations.
Select medium to large clear glass jars with high optical clarity and airtight lids or cork stoppers. Start building your display by pouring a layer of authentic beach sand collected during your trip into the base of the jar, creating an even foundation about one to two inches deep. If you visited multiple beaches, you can layer sands of different shades (such as white, pink, tan, and black sand) to build an eye-catching geological gradient.
Carefully place your largest collected seashells, dried starfishes, and polished pieces of sea glass onto the sand bed using long tweezers. You can add a tiny tied scroll of paper inside containing written notes detailing the date, GPS coordinates, or fun memories from that specific beach trip. Seal the jar with its cork stopper, tie a piece of rustic hemp string around the neck, and attach a small wooden tag stamped with the location name (e.g., “Cape Cod 2023”).
18. Vintage Thread & Button Sewing Organizers
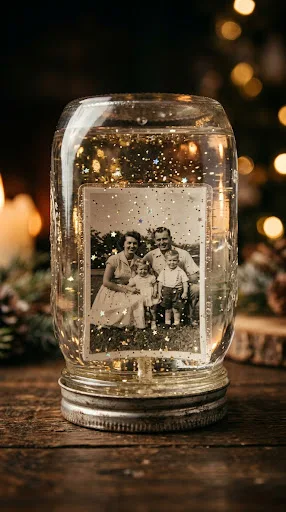
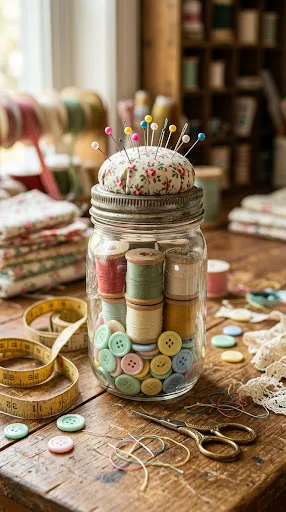
For craft enthusiasts, sewers, and quilters, keeping small haberdashery supplies sorted can be a constant challenge. Vintage thread and button sewing organizers repurpose glass jars into dual-purpose storage solutions that combine functional pin cushions with clear button jars. These charming organizers keep colorful threads, vintage buttons, measuring tapes, and thimbles organized while adding a touch of vintage craft room nostalgia to your creative workspace.
To craft the pin cushion lid, remove the flat inner disc from a two-piece mason jar lid. Cut a circle of vintage floral fabric about twice the diameter of the lid disc. Place a generous wad of polyester fiberfill stuffing in the center of the fabric, place the metal disc on top, and wrap the fabric edges around the back, gluing them down firmly with hot glue to form a puffy, rounded cushion bursting through the center of the metal lid ring.
Screw the assembled cushion lid onto your glass jar. Fill the clear glass base of the jar with color-coordinated vintage buttons, wooden spools of thread, thimbles, measuring tapes, or safety pins. Insert your sewing needles and pearl-topped straight pins directly into the padded cushion top. These charming jars keep your vital sewing notions organized, visible, and easily accessible while adding classic handmade charm to your craft room shelves.
19. Sun-Catching Beaded Wire Glass Vases
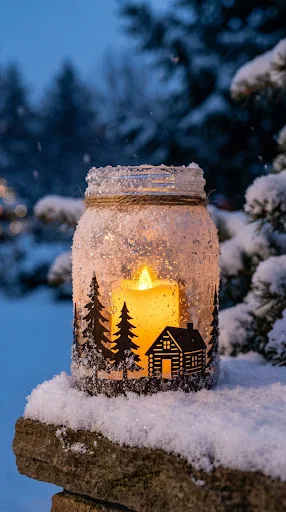
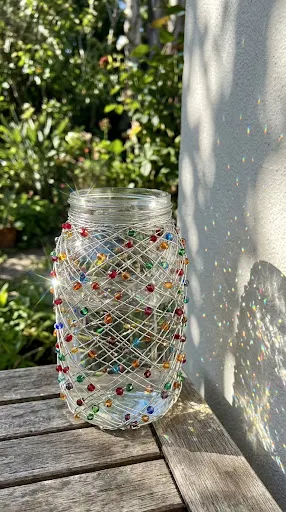
Capture and refract natural sunlight by wrapping glass jars in shimmering patterns of beaded wire. Sun-catching beaded wire glass vases transform ordinary jars into intricate, glittering light catchers using flexible craft wire and a dazzling mix of colorful glass beads, crystal prisms, and metallic spacers. Hung in a sunny kitchen window or placed on a bright outdoor patio table, these beaded vessels throw brilliant sparkles and rainbow reflections all over your space.
You will need flexible 20-gauge or 22-gauge craft wire in gold, copper, or silver, along with an assortment of faceted glass beads, crystal beads, and small charms. Begin by wrapping a primary piece of thick wire tightly around the neck rim of the jar to create a secure anchor ring. Cut long lengths of thinner wire, attach them to the neck ring, and begin stringing colorful glass beads in custom sequences.
Weave and twist the beaded wire strands around the body of the jar, forming crisscross lattice grids, swirling spiderweb spirals, or elegant vertical bead cascades. Ensure the wire netting fits snugly around the contours of the glass so it stays locked in place. Attach a heavy wire handle across the top rim if you wish to hang your vase. When light strikes the faceted glass beads and clear jar, it casts dazzling rainbow refractions, creating a delightful visual effect day and night.
20. Halloween Spooky Silhouette Glow Jars
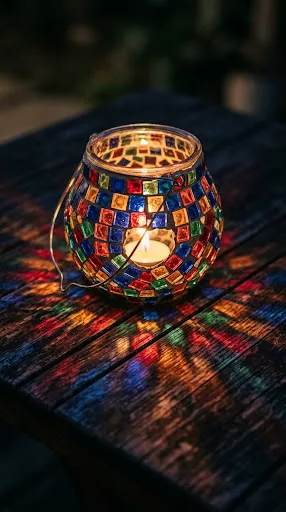
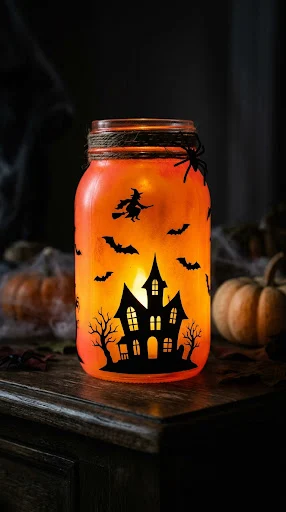
Celebrate the spooky season with captivating Halloween silhouette glow jars. This fun holiday craft combines glowing orange, deep purple, or eerie green painted glass with dark, spooky cut-out silhouettes of witches, bats, haunted houses, black cats, and howling wolves. When glowing in the dark, these jars emit a dramatic, spooky light that is ideal for lining your front porch steps, decorating Halloween party tables, or illuminating windowsills on trick-or-treat night.
Start by painting the entire outer surface of clean glass jars with semi-translucent glass paint, tissue paper decoupage, or spray paint in vibrant Halloween shades like neon orange, lime green, or deep violet. Allow the base color to dry completely. Next, print or draw spooky Halloween silhouettes on matte black vinyl or black cardstock paper, cut them out carefully with precision craft scissors or a craft knife, and stick them onto the jar base.
To enhance the eerie atmosphere, brush a coat of glow-in-the-dark acrylic paint or clear liquid adhesive sprinkled with fine iridescent glitter over the top of the jar rim. Wrap black spiderweb lace or fuzzy pipe-cleaner spider legs around the neck of the jar. Drop a bright battery-operated LED light or flickering tea light inside. The sharp black silhouettes stand out dramatically against the fiery glowing backdrop, creating a thrilling and spooky festive atmosphere.