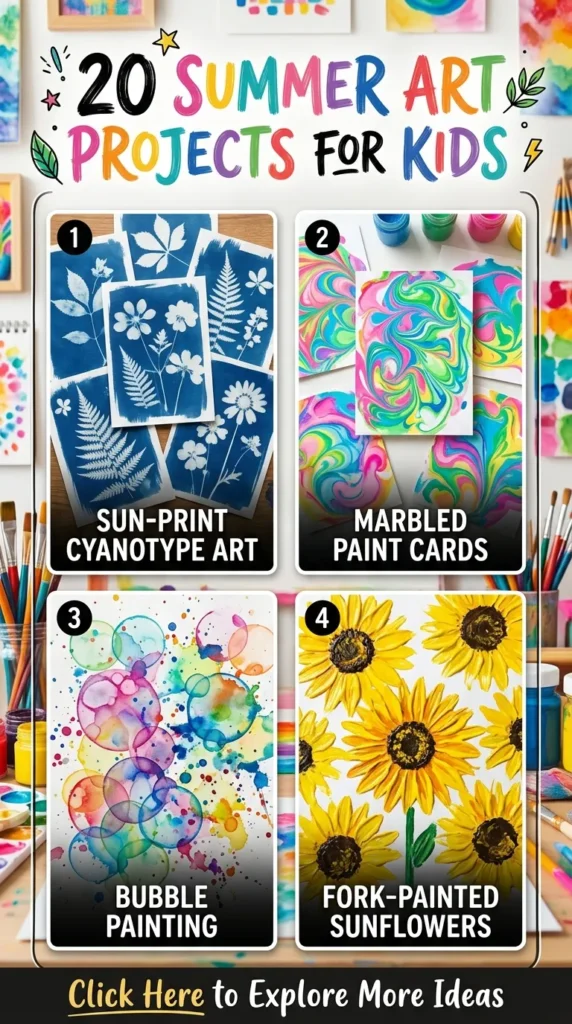
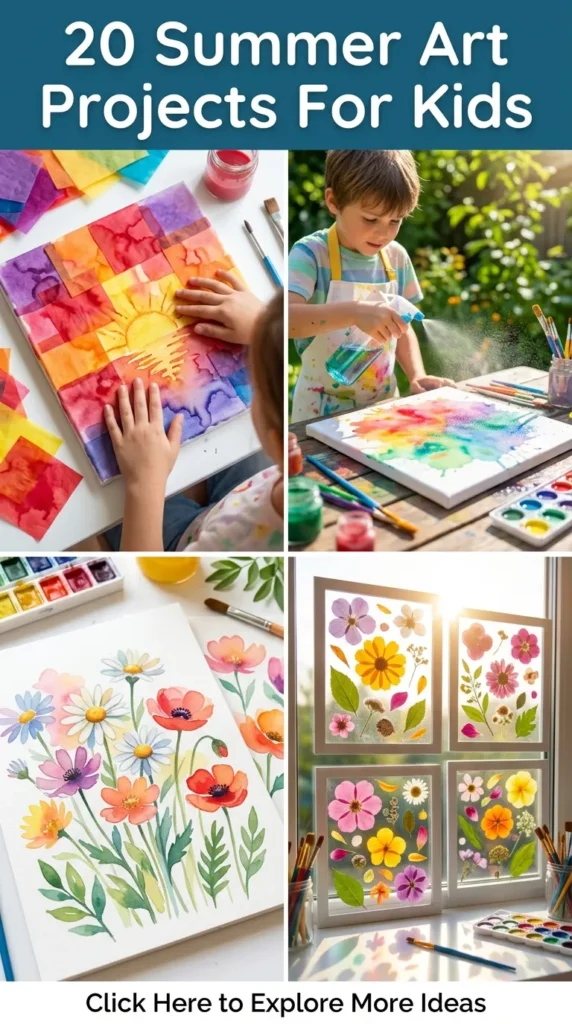
Summer creativity should feel like an organic extension of warm, sunlit afternoons—less about rigid classroom craft kits and more about open-ended material exploration, tactile sensory play, and contemporary visual design. These 20 curated projects embrace natural textures, clean Scandinavian and minimalist palettes, gentle organic forms, and child-led creative discovery.
Each project delivers gallery-worthy results while remaining completely accessible, safe, and engaging for curious hands.
1. Minimalist Sun-Printed Cyanotype Botanical Silhouettes
Introduction
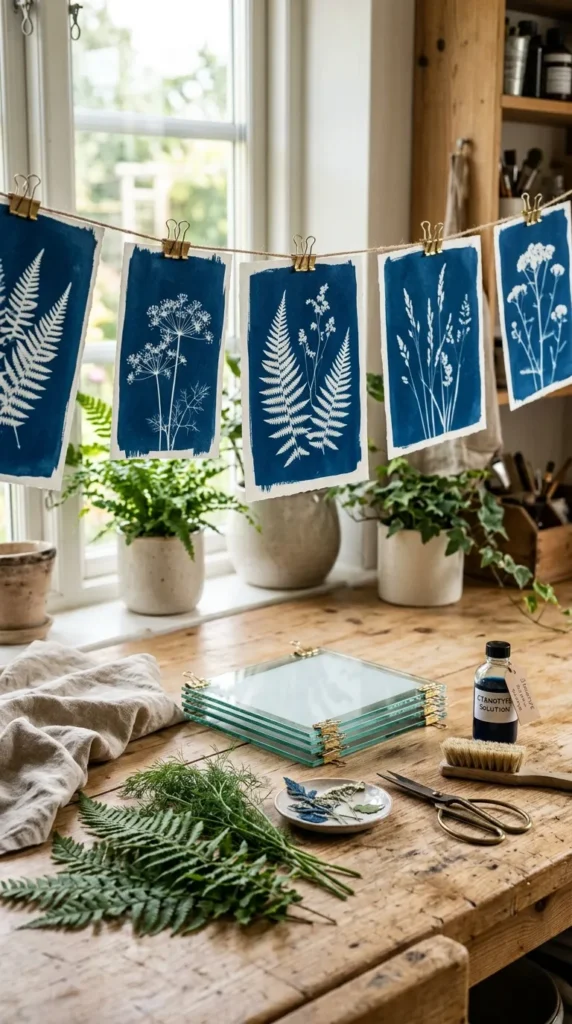
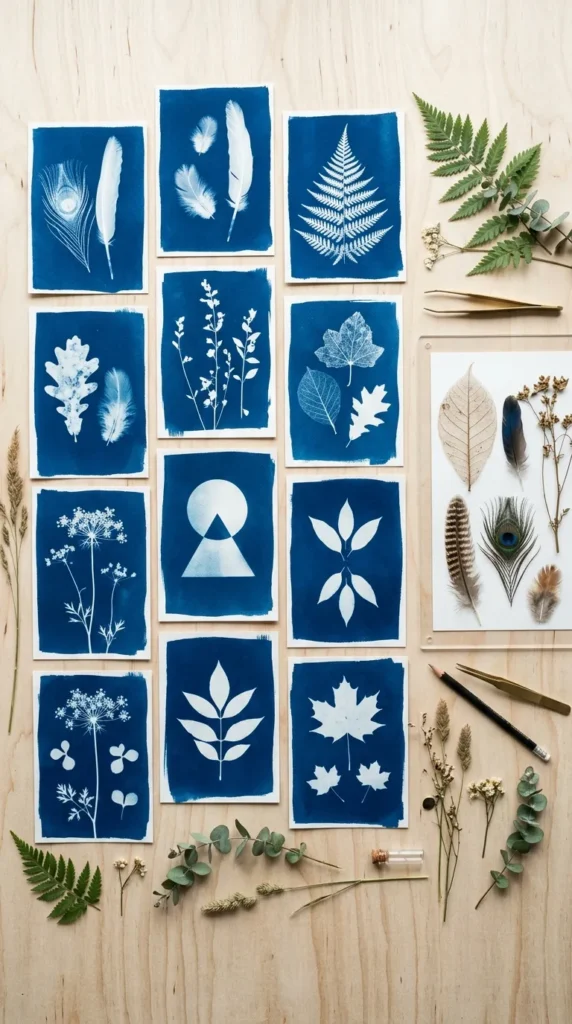
Cyanotype is a classical 19th-century photographic process that harnesses UV sunlight to produce striking, deep Prussian-blue prints. When paired with fresh summer botanicals, this process transforms backyard foraging into fine-art architectural prints suitable for modern nursery and living room galleries.
What This Idea Means
This project merges basic chemistry, outdoor foraging, and photographic silhouette composition. It teaches children to observe positive and negative space, leaf venation, structural geometry, and how natural light interacts with chemical emulsions.
Materials Needed
- Pre-treated cyanotype paper or cotton fabric sheets (A4 or 5×7 size)
- Freshly gathered botanical cuttings (ferns, pressed wildflowers, palm fronds, clover)
- Clear acrylic sheet or picture frame glass
- Sturdy cardboard backing board and binder clips
- Shallow basin filled with cold tap water
- Optional: A splash of hydrogen peroxide to intensify the Prussian blue
How to Make It
- Take children on a morning nature walk to gather flat botanical specimens with distinct contours (ferns, laceflower, dill blossoms, and dandelion leaves work exceptionally well).
- In a dimly lit room away from direct window sunlight, arrange the botanical cuttings onto the sensitive cyanotype paper.
- Sandwich the arrangement between the cardboard backing and the clear acrylic sheet, securing all four sides with binder clips to hold the foliage flat against the surface.
- Carry the frame out into direct midday sunlight. Expose the paper for 2 to 5 minutes until the exposed bronze-green emulsion turns a pale silvery-bronze hue.
- Bring the frame back inside, remove the glass, and discard the foliage.
- Submerge the exposed paper immediately in the water basin, rinsing gently for 3 to 5 minutes until the yellow chemical runoff disappears and the white silhouette sharpens against the deep blue background.
- Lay flat on clean paper towels or hang on a mini clothesline to dry completely.
Tips and Variations
- Contrast Boosting: Add 1 tablespoon of standard household hydrogen peroxide into the final rinse water to instantly oxidise the cyanotype into deep indigo.
- Translucent Layering: Use semi-transparent elements like dried citrus rounds or lace ribbons to create layered mid-tones.
- Textile Edition: Use pre-treated organic linen squares to create botanical wall hangings with frayed edges.
2. Scandinavian Air-Dry Clay Botanical Imprint Discs
Introduction
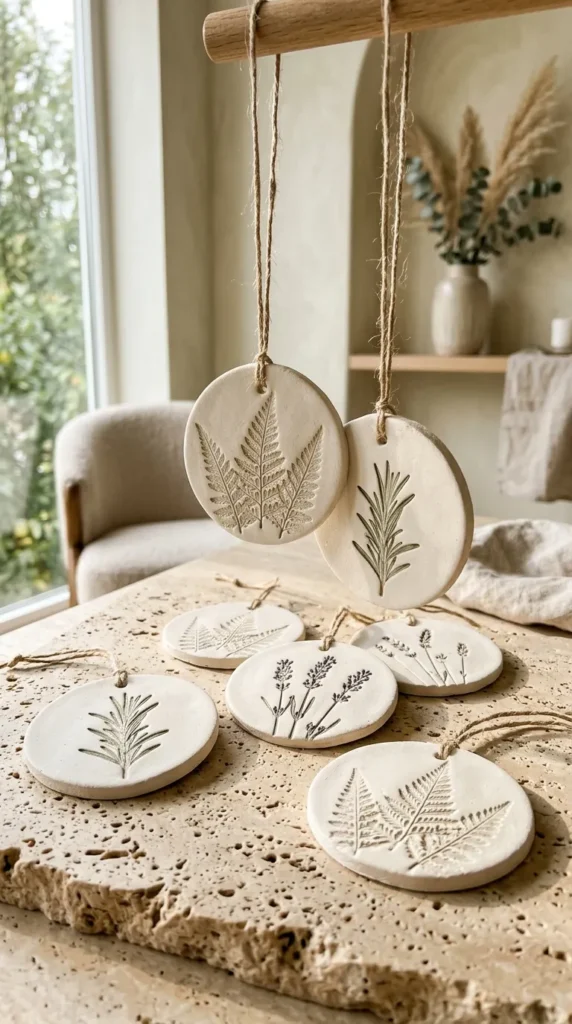
Gentle, earthy, and tactile, these minimalist white clay discs capture the delicate micro-textures of summer flora. Left unglazed or lightly washed with diluted raw umber, they function as elegant wall hangings, coaster sets, or mobile elements.
What This Idea Means
This activity shifts the child’s tactile experience from hyper-coloured commercial doughs to genuine earthy clay. It encourages gentle hand-pressure regulation, fine motor precision, and an appreciation for raw, organic textures and clean geometric circles.
Materials Needed
- Premium white mineral air-dry clay (e.g., DAS or Jovi)
- Rolling pin or smooth wooden dowel
- Round stainless steel pastry cutters (assorted sizes from 3 to 6 inches)
- Fresh, sturdy botanical sprigs (lavender, rosemary, pine needles, thistles)
- Wooden skewer or drinking straw (for hanging holes)
- Sandpaper (220-grit fine)
- Natural raw flax or hemp twine
How to Make It
- Cut an orange-sized portion of air-dry clay and roll it out evenly between two flat wooden guides to a thickness of roughly 6mm (1/4 inch).
- Lightly position a fresh sprig of rosemary, fern frond, or pressed blossom onto the clay surface.
- Roll over the botanical once with firm, even pressure using the rolling pin to embed the sprig flush with the clay surface.
- Carefully lift the stem using tweezers or your fingernails, leaving a crisp botanical fossil impression.
- Press the circular stainless steel cutter firmly through the clay around the impression and remove excess scrap clay.
- Punch a neat suspension hole near the top edge using a wooden skewer.
- Allow the discs to cure undisturbed on a parchment-lined flat baking tray for 48 to 72 hours, flipping them once after 24 hours to prevent edge warping.
- Once bone dry, gently buff the rough circumference with fine sandpaper.
Tips and Variations
- Earth Wash: Brush watery sepia watercolour into the recesses of the plant impression, then immediately wipe the surface clean with a damp sponge so the colour remains only inside the delicate leaf veins.
- Gilded Rim: Paint the raw outer edge with liquid metallic gold leaf using a fine-tip liner brush.
- Geometric Shapes: Switch to arch-shaped or hexagonal clay cutters for an architectural aesthetic.
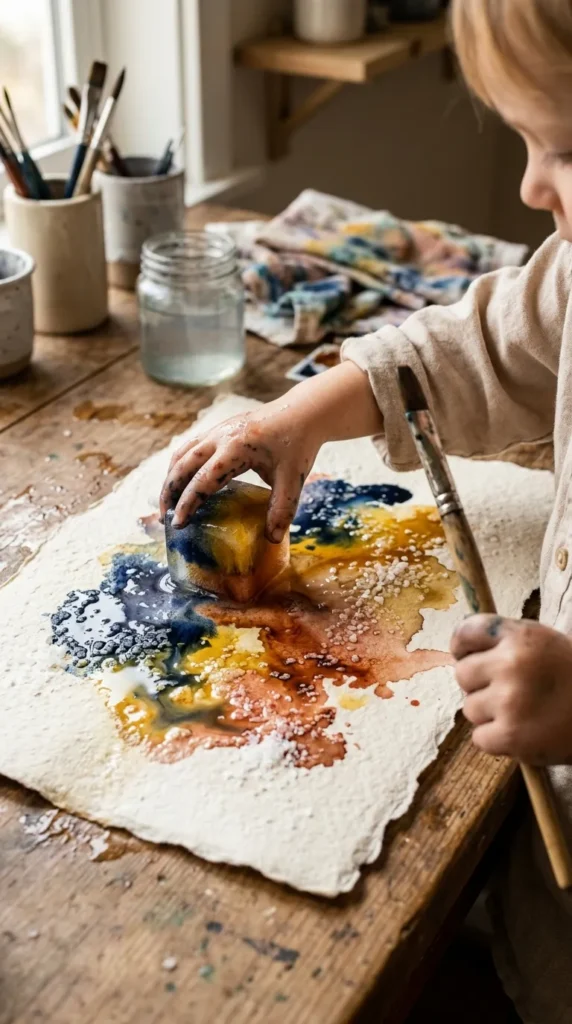
3. Translucent Water Soluble Oil Pastel Ice Block Melt Paintings
Introduction
Harnessing summer heat as a creative collaborator, this dynamic melting project creates ethereal, atmospheric colour fields on heavy cotton rag paper using vibrant artist-grade water-soluble pastels and crystal ice cubes.
What This Idea Means
It bridges sensory temperature play with abstract expressionism. Kids witness fluid dynamics, phase change, gravity flow, and colour saturation as ice transitions from frozen geometry to flowing, pigment-carrying liquid streams.
Materials Needed
- 300gsm (140 lb) cold-pressed watercolour paper
- Artist-grade water-soluble oil pastels or gouache pastels (e.g., Caran d’Ache Neocolor II)
- Ice cube trays (including oversized square and spherical shapes)
- Large shallow wooden trays or waterproof rimmed baking sheets
- Pipettes or small spray mist bottles
- Sea salt crystals
How to Make It
- Tape a sheet of heavy watercolour paper securely inside the waterproof rimmed tray.
- Encourage the child to draw loose, bold geometric compositions, warm organic colour rings, or sweeping gestural lines across the paper using the water-soluble pastels.
- Place 4 to 6 large clear ice cubes strategically across the dry pastel drawings.
- Set the tray in a warm, sunny outdoor spot or breezy veranda.
- As the ice begins to melt, tilt the tray gently in different directions to steer the micro-rivulets of pigment across untouched regions of the paper.
- Sprinkle coarse sea salt over wet pigment pools to create blooming crystal patterns.
- Once the ice is fully dissolved, carefully siphon away pooling excess water with a pipette and leave the paper flat to dry into a rich, atmospheric gradient painting.
Tips and Variations
- Floral Ice Cubes: Freeze edible flower petals, marigold heads, and mint leaves inside the ice blocks before painting to add multisensory botanical discovery.
- Monochrome Mood: Use a cohesive, controlled palette of Prussian blue, slate grey, and warm ochre for an elevated museum look.
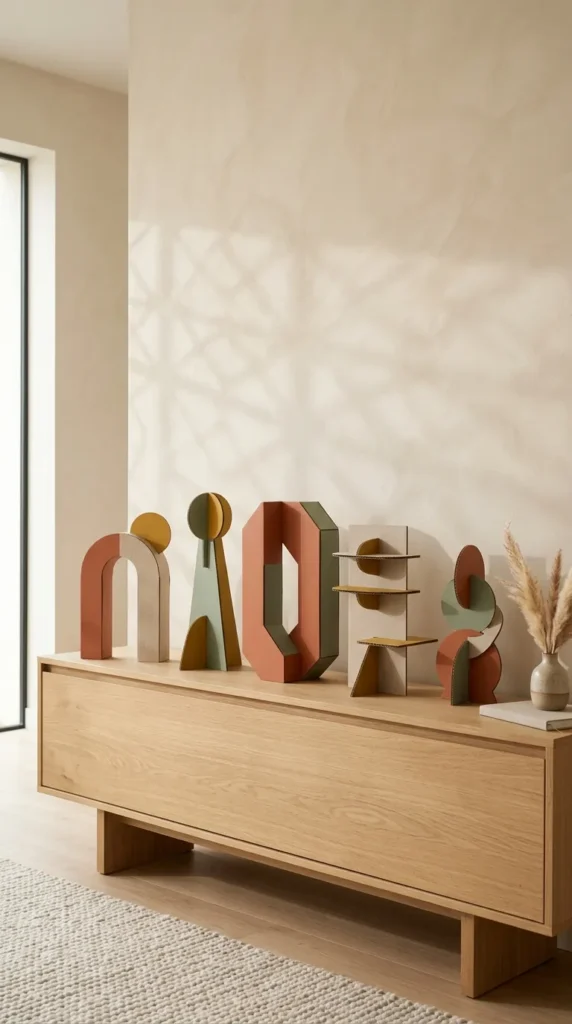
4. Bauhaus Architectural Cardboard Geometric Sculptures
Introduction
Turning clean discarded packing cardboard into sleek desktop architectural monuments, this project introduces children to constructive spatial reasoning, structural balance, and the bold geometric simplicity of early modern design.
What This Idea Means
Cardboard construction moves past clumsy tape-wrapped boxes into modular, slot-together geometric engineering. Kids explore intersecting planes, 3D positive and negative space, cantilevered balance, and structural integrity without messy wet glues.
Materials Needed
- Heavy single-wall corrugated cardboard (plain, without printed text)
- Child-safe cardboard shears or rotary cutter (adult-supervised)
- Acrylic craft paint in a muted modern palette (terracotta, olive, linen, charcoal, mustard)
- Flat synthetic wash brushes
- Wooden base block or pre-cut heavy plywood square
- Ruler and pencil
How to Make It
- Mark out precise geometric shapes onto the raw cardboard sheets: sweeping arches, circles, half-moons, rectangles, and asymmetric cantilever arms.
- Carefully cut out the shapes with clean, crisp edges.
- Paint each geometric cardboard flat with smooth, matte acrylic paint. Apply two light coats to prevent the cardboard from curling, leaving some pieces in raw kraft brown for textural contrast.
- Once dry, cut narrow vertical and horizontal slots (matching the cardboard’s exact thickness) into the top, bottom, and side edges of the shapes.
- Guide the child in slotting the pieces into one another, building upwards and outwards from a stable interlocking base plane.
- Experiment with asymmetry, counterweight balance, and open viewports through the sculpture.
Tips and Variations
- Mobile Conversion: Instead of standing structures, drill tiny holes and balance the slotted shapes horizontally on wire rods to build Calder-inspired kinetic hanging mobiles.
- Archway Shadow Play: Place the finished sculptures on a sunny windowsill at dusk to observe the cast geometric shadow patterns across walls and tables.
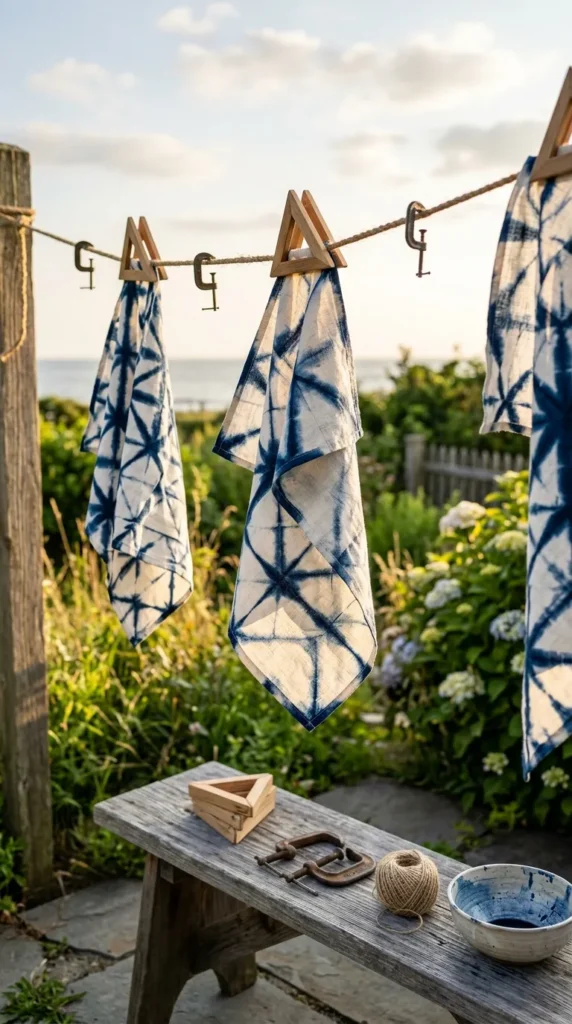
5. Japanese Shibori Indigo Resist-Dyed Linen Napkins
Introduction
Shibori is the ancient Japanese art of shape-resist dyeing. By folding, clamping, and binding square linen cloth before dipping it into natural indigo dye vats, children create clean geometric mandalas and crisp white grid patterns across deep navy textiles.
What This Idea Means
This craft teaches patience, precise geometric folding, and the magic of natural chemistry. It shifts children’s textile awareness from disposable fast fashion to sustainable, high-craft utilitarian items they can use at family summer dinners.
Materials Needed
- Natural pre-washed 100% white linen or cotton dinner napkins
- All-in-one non-toxic Indigo dye kit
- Smooth wooden craft blocks (squares, triangles, circles)
- C-clamps or heavy-duty rubber bands
- Wooden dowels and cotton string
- Long rubber gloves and protective apron
- Large plastic buckets for dyeing and rinsing
How to Make It
- Accordion-fold a damp linen napkin lengthways into a long, crisp rectangular strip roughly 3 inches wide.
- Accordion-fold the strip into neat triangles or squares to create a dense geometric bundle.
- Sandwich the folded fabric bundle between two wooden craft blocks (such as matching wooden triangles or circles).
- Secure the sandwich tightly using heavy-duty rubber bands or a small C-clamp. The pressure prevents the indigo dye from entering the wood-covered sections.
- Submerge the clamped bundle into water first, squeeze gently, then lower it into the prepared indigo dye vat for 5 minutes, gently massaging the edges under the surface without introducing oxygen bubbles.
- Lift the bundle out: the exposed fabric will appear bright chartreuse-green.
- Set the bundle on a drying rack for 15 minutes; watch as exposure to oxygen turns the green into deep, rich indigo blue.
- Cut the rubber bands, unclamp the wood, unfold the napkin to reveal the crisp white geometric resist pattern, and rinse thoroughly in cold water until it runs clear.
Tips and Variations
- Itajime vs. Arashi: Try wrapping the fabric around a smooth PVC tube and scrunching it tightly along the pipe to achieve flowing diagonal rainstorm stripes (Arashi Shibori).
- Summer Table Set: Make an assorted set of four napkins, each utilizing a different geometric fold (triangle, square, diagonal roll, clamped penny discs).
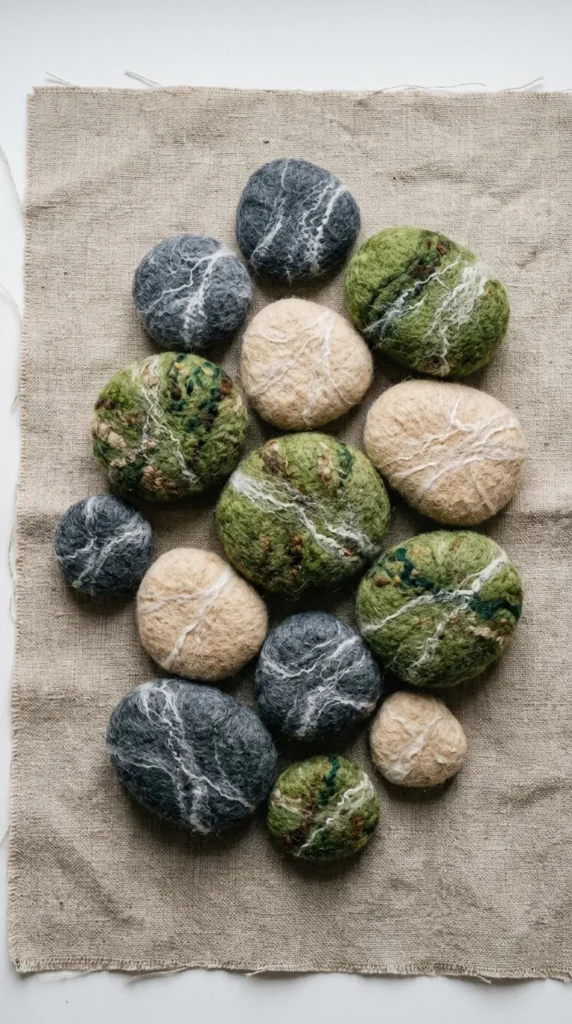
6. Minimalist Wet-Felted Wool River Pebbles
Introduction
Using warm soapy water, carded merino wool, and smooth garden stones, children transform raw fiber into seamless, soft, tactile faux-stone sculptures that resemble tumbled river pebbles found along Scandinavian coastlines.
What This Idea Means
Wet felting provides rich sensory proprioceptive input. It teaches how heat, friction, and alkaline soap bind microscopic animal fibers into dense, solid cloth structures, transforming raw wool into functional modern home decor.
Materials Needed
- Carded merino wool roving in natural stone tones (slate grey, ivory, oat, charcoal, moss green)
- Smooth, rounded river rocks (egg-sized to fist-sized)
- Warm water and mild olive oil soap or liquid dish soap
- Bubble wrap sheet and old sushi rolling mat
- Large bowl or wash basin
- Soft hand towels
How to Make It
- Select a smooth, palm-sized river stone as the core structure.
- Gently pull whisper-thin tufts of merino wool roving. Wrap a light horizontal layer around the entire stone.
- Wrap a second thin layer perpendicular (vertically) across the first layer to create an interlocking crosshatch grid.
- Add small, wispy threads of white or sage-green roving across the exterior to simulate natural stone veining and mineral streaks.
- Place the wrapped stone onto the bubble wrap. Wet it thoroughly with warm soapy water until completely saturated.
- Gently cup the stone with both hands and begin rolling it with light circular motions. The delicate surface wool will slowly start to knit together without shifting.
- As the wool shrinks and tightens around the rock, increase hand pressure, rolling it firmly against the textured bubble wrap or sushi mat.
- Once the felt fits the stone like a skin, rinse the pebble in cold water to remove soap residue and let dry in the sun.
Tips and Variations
- Wool-Only Rocks: Wrap wool roving around a dry scrap-wool ball instead of a real rock to make lightweight, soft indoor toss toys or sensory paperweights.
- Essential Oil Diffusers: Drop a few drops of natural lavender or cedarwood essential oil onto the felted pebble to scent a bedroom wardrobe or desk.
7. Modernist Wire & Tissue Paper Calder-Inspired Mobiles
Introduction
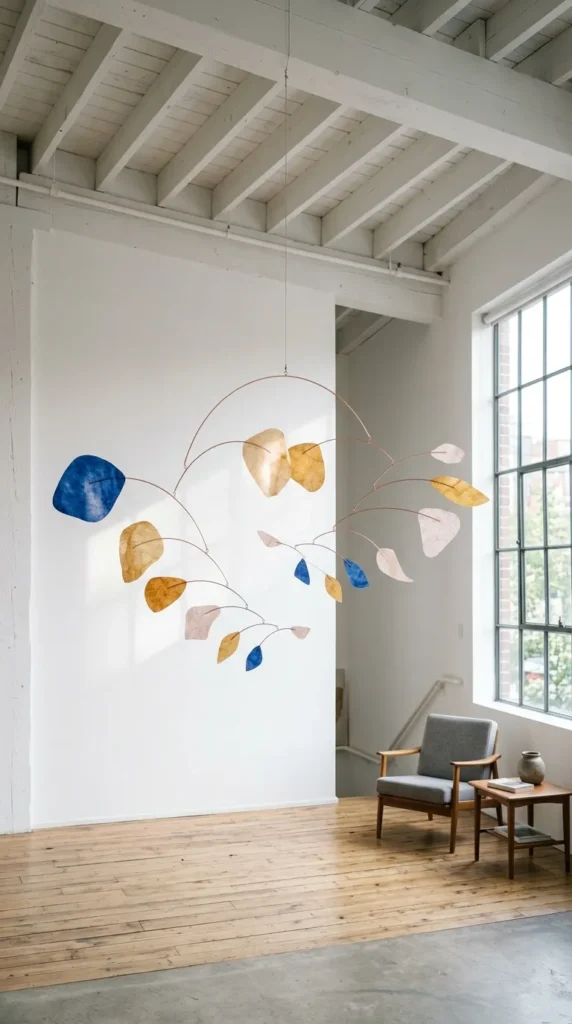
Light, responsive, and sculptural, these kinetic wind mobiles dance with the faintest summer breeze. Inspired by Alexander Calder’s legendary mobiles, this project combines copper craft wire with translucent tinted Japanese tissue papers.
What This Idea Means
Kinetic art bridges two-dimensional drawing and structural engineering. Children explore the physics of equilibrium, fulcrums, air currents, balance ratios, and the visual beauty of intersecting transparent colors.
Materials Needed
- 16-gauge and 20-gauge malleable aluminum or copper craft wire
- Needle-nose craft pliers with wire cutters (adult-assisted)
- High-grade Japanese bleeding and non-bleeding colored tissue paper
- Mod Podge (matte finish) or diluted PVA craft glue with small brushes
- Clear monofilament nylon fishing line
- Wooden branch or brass hoop for ceiling suspension
How to Make It
- Cut 12-inch lengths of 16-gauge malleable wire.
- Guide children in bending the wire into balanced organic silhouettes: teardrops, floating bean curves, asymmetric ovals, and abstract leaf contours.
- Twist the wire ends neatly closed with needle-nose pliers, leaving a tiny loop eyelet at the top for suspension.
- Lay the wire shape flat over a sheet of colorful tissue paper. Brush the wire perimeter with a thin coat of matte Mod Podge and press it down onto the paper.
- Once dry, trim away the excess tissue around the outer wire frame with sharp detail scissors.
- Cut varying lengths of thinner 20-gauge balance arms with curved loop hooks at both ends and a balance loop in the middle.
- String the tissue paddles together sequentially, adjusting the balance points along each horizontal wire arm until the entire multi-tier system balances in mid-air.
Tips and Variations
- Color Blending Layering: Glue two layers of contrasting translucent tissue (such as cobalt blue and sun yellow) inside a single frame to observe vibrant green color synthesis when backlit.
- Natural Branch Armature: Hang the kinetic elements from a sun-bleached piece of ocean driftwood.
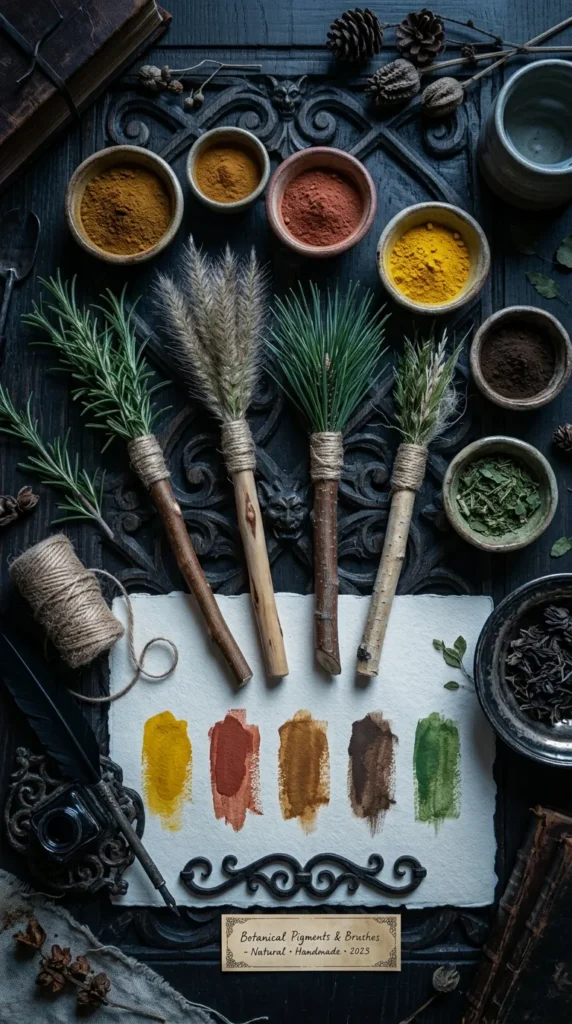
8. Earth Pigment & Wild Herb Paint Brushes
Introduction
Reconnecting children with the origins of art materials, this project pairs hand-foraged botanical paintbrushes made from summer twigs and pine needles with velvety natural soil paints made from backyard clays and ground spices.
What This Idea Means
It de-commercializes the art-making process. Kids learn that pigments come from the physical Earth—soils, minerals, spices, and plants—and that mark-making tools can be handmade from foraging rather than purchased in plastic tubes.
Materials Needed
- Assorted straight summer twigs and smooth wooden sticks (6 to 8 inches long)
- Fresh botanical bristles: rosemary sprigs, stiff pine needles, fountain grass heads, feathers, palm fibers
- Natural jute twine or floral wire
- Sifted backyard clay soil, raw terracotta powder, ground turmeric, spirulina powder, and raw cocoa
- Egg yolk or gum arabic binder with tap water
- Heavy rough-tooth handmade rag paper
How to Make It
- Gather sturdy twigs during a nature walk to serve as brush handles.
- Select a bundle of flexible, textured botanical cuttings (such as a cluster of fragrant rosemary sprigs or soft switchgrass plumes) to act as the bristle head.
- Align the botanicals with the tip of the twig and wrap natural jute twine tightly around the junction. Knot securely and trim the bristles evenly or leave them raw.
- Prepare earth paint: sift backyard dry soil through a fine kitchen strainer into a ceramic bowl to remove coarse pebbles.
- Blend 2 tablespoons of fine earth/spice powder with 1 egg yolk (or 1 teaspoon gum arabic) and 1 tablespoon of water to create smooth tempera paint.
- Dip the bespoke botanical brushes into the earth pigments and paint dynamic, expressive, expressive texture strokes across rough watercolor paper.
Tips and Variations
- Texture Palette Catalog: Create a swatch study grid documenting the different marks produced by pine needles versus soft feather tips and coarse palm bristles.
- Aroma Painting: Infuse the earth paints with crushed mint leaves or ground cinnamon for a multi-sensory olfactory experience.
9. Pressed Summer Flower Stained Glass Sun-Catchers
Introduction
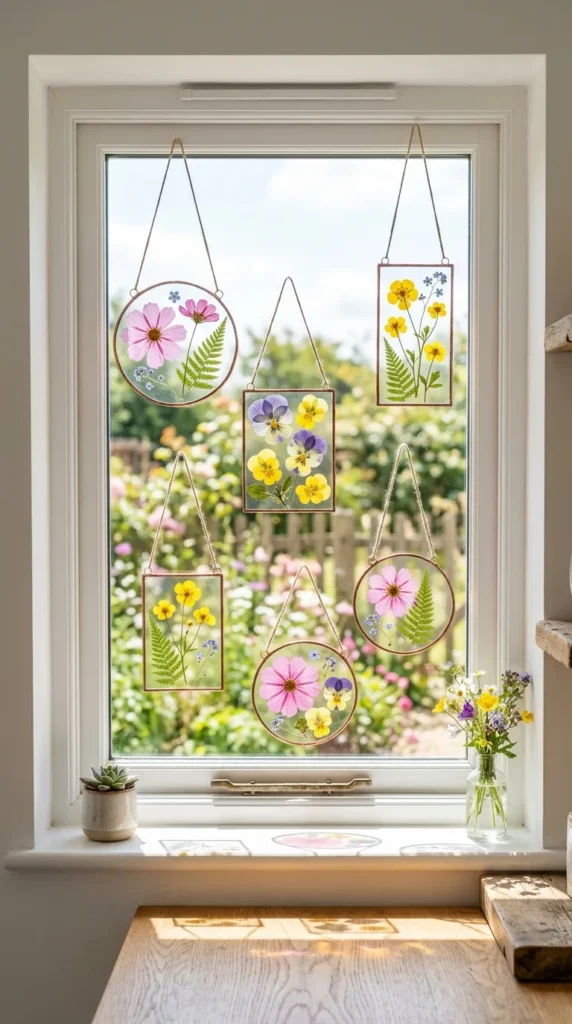
Suspended in window casements, these glass-like resinless floating frames preserve the vivid petals of midsummer blooms between layers of clear, safe acrylic and light wooden border frames.
What This Idea Means
Children explore light transmission, composition, botany, and seasonal preservation. It transforms fleeting summer garden petals into enduring, transparent installations that illuminate interiors with natural ambient colour.
Materials Needed
- Freshly pressed and dried summer flowers (pansies, cosmos, hydrangeas, buttercups, fern fronds)
- Heavy books and absorbent blotting paper (for pressing 5 days prior)
- Clear self-adhesive laminate film or two matching sheets of thin cast acrylic
- Basswood strip framing or heavy archival mounting matboard
- Linen bookbinding tape or copper foil tape
- Suede cord for hanging
How to Make It
- Pick garden blooms in dry afternoon conditions and press them flat between sheets of blotting paper inside a heavy book for 5 to 7 days until moisture is extracted.
- Cut two identical sheets of clear cast acrylic or clear self-adhesive laminate sheet to your desired frame size (e.g., 6×8 inches).
- Lay one clear sheet flat over a white paper template. Carefully arrange the dry, pressed floral specimens across the clear surface using tweezers, maintaining balance and negative space between petals.
- Slowly lower the second clear sheet over the arrangement, starting from one edge to prevent trapping air bubbles, sealing the flat botanicals between the clear panes.
- Seal the raw perimeter edges using neat wraps of metallic copper foil tape or self-adhesive natural linen bookbinding tape.
- Attach two small hanging loops on the top edge, thread with soft suede cord, and suspend against a sunny windowpane.
Tips and Variations
- Geometric Window Grids: Group multiple small rectangular sun-catchers together into a modular floating triptych window installation.
- Pressed Citrus Slices: Include paper-thin dehydrated blood orange or lime rounds for stained-glass jewel tones.
10. Textured Plaster of Paris Beach Cast Bas-Relief Tablets
Introduction
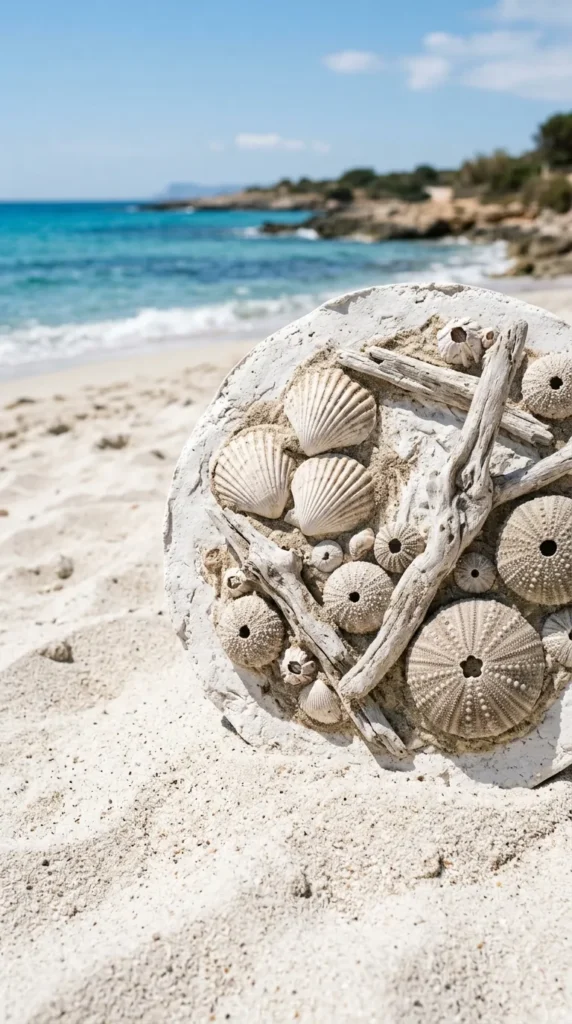
Capturing the coastal essence of summer holidays, this project uses wet sand as a moldable negative imprint matrix. Liquid white casting plaster poured directly into beach-sand molds produces architectural bas-relief wall plaques embedded with genuine shore treasures.
What This Idea Means
This introduces children to negative-space mold making, foundry casting techniques, and sculptural topography. It flips dimensional thinking: an impression pushed down into the sand emerges as a raised, protruding 3D surface on the finished plaster cast.
Materials Needed
- Fine clean playground sand or real coastal beach sand
- Sturdy rimmed basin or shallow wooden box
- Plaster of Paris or fine white casting plaster
- Foraged beach treasures (scallop shells, driftwood bits, sea glass, starfish, sea urchin shells)
- Clean water and flexible mixing bowl
- Heavy picture wire bent into a U-shape (for the internal hanging loop)
How to Make It
- Fill a shallow basin with 3 inches of sand and dampen it evenly with water until it holds a crisp shape when squeezed in your fist.
- Smooth the sand surface flat with a ruler.
- Press shells, driftwood, seed pods, or children’s handprints firmly down into the damp sand, then carefully lift them straight out, leaving crisp negative hollows.
- Mix Plaster of Paris with water in a flexible bowl according to package directions (typically 2 parts plaster to 1 part water) until it reaches the consistency of pancake batter.
- Slowly pour the liquid plaster into the sand depressions and across the surrounding sand bed to form a cohesive 1-inch thick circular or rectangular tablet.
- While the plaster is still wet and creamy, push the ends of the U-shaped picture wire loop into the back center of the plaster for future hanging.
- Allow the plaster to cure undisturbed for 45 to 60 minutes until hot and rock-hard.
- Gently lift the tablet out of the sand bed, brush away loose dry sand with a soft bristle paintbrush, and let dry completely. A fine layer of sand will remain permanently fused to the raised plaster contours.
Tips and Variations
- Shell Imbedding: Leave the actual seashells sitting face-down inside the sand hollows before pouring the plaster; they will fuse into the casting as it hardens.
- Frame Mold: Press an open circular wooden embroidery hoop into the damp sand first, then pour the plaster within the hoop boundary for crisp circular borders.
11. Minimalist Sun-Dyed Solar Paper Cyan Monoprints
Introduction
Exploring instant photochemical reactions, Sunprint paper reacts to full-spectrum sunlight within seconds. Children use everyday domestic and natural objects to compose clean, high-contrast silhouette monoprints that capture shadow gradients and light transparency.
What This Idea Means
This teaches speed, deliberate planning, and the physics of the electromagnetic spectrum. Because Solar Paper reacts faster than traditional cyanotype, kids must conceptualize their full spatial composition before exposing the page to light.
Materials Needed
- Solar Photo Paper sheets (available in classic blue or solar sepia)
- Flat acrylic pressing pane
- Translucent and opaque objects: feathers, flat skeleton leaves, sea glass, safety pins, lace offcuts, sliced dried fruit
- Tap water tray
- Lemon juice in a spray bottle
How to Make It
- Set up a shadow workspace indoors or under a wide patio umbrella away from direct sunlight.
- Remove a sheet of blue solar paper and place it flat on your workspace.
- Quickly arrange the chosen natural objects across the blue sheet, balancing dense solid elements with translucent textures like skeleton leaves.
- Place the clear acrylic sheet over the composition to keep lightweight elements from shifting in the wind.
- Carry the setup into bright sunlight for 1 to 3 minutes until the blue paper turns pale, soft white.
- Bring the sheet back into the shade, remove the objects, and submerge the sheet in cold water for 1 minute to lock in the image.
- Observe the photographic reversal: the white shapes darken into deep navy blue, while the covered unexposed areas turn pure white.
Tips and Variations
- Lemon Splatter Effects: Flick tiny droplets of lemon juice onto the wet paper during rinsing to create starlight constellations and white micro-blooms.
- Typography Elements: Cut letters or words out of heavy black cardstock to print personalized architectural quotes or names alongside botanicals.
12. Monochromatic Sand & Acrylic Impasto Texture Paintings
Introduction
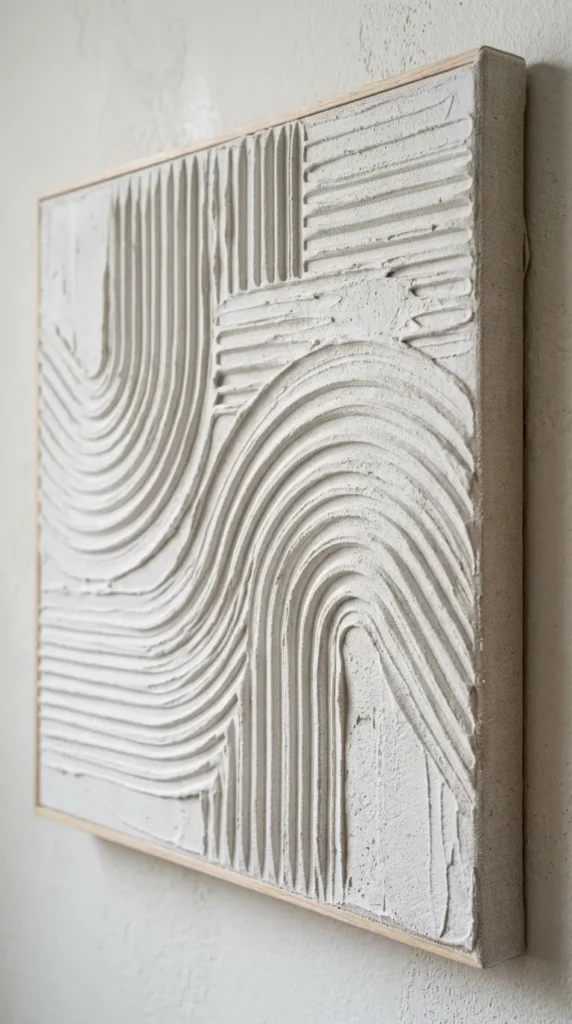
Channeling contemporary plaster and impasto gallery paintings, this project blends fine beach sand with thick acrylic paint, allowing kids to create minimalist, deeply textured sculptural canvases using palette knives and notched cardboard combs.
What This Idea Means
Children explore monochromatic art, relief textures, directional light reflection, and thick structural paint handling. It strips away color distractions to focus purely on tactile mark-making, rhythmic patterns, and sculptural surfaces.
Materials Needed
- Stretched canvas boards or heavy wood panels (8×10 or 12×12 inches)
- Heavy-body white acrylic paint or white acrylic modeling paste
- Fine washed beach sand or mineral quartz sand
- Plastic artist palette knives and triangular notched scraping combs
- Warm neutral acrylics (sandstone, chalk, raw linen, taupe)
- Mixing containers and wooden tongue depressors
How to Make It
- In a mixing tub, combine 2 parts heavy-body acrylic paint or modeling paste with 1 part clean fine sand. Stir with a wooden tongue depressor until it forms a thick, gritty paste similar to frosting.
- Scoop a generous dollop of the textured paste onto the center of the wooden canvas board.
- Guide the child to spread the paste edge-to-edge using a flat palette knife, maintaining an even thickness of about 4mm.
- Using notched scraping combs or the tip of the palette knife, carve rhythmic wave lines, concentric arches, or bold diagonal grooves into the wet paste.
- Encourage steady, continuous arm movements to create sweeping, meditative patterns.
- Leave the canvas flat in a dust-free area for 24 hours to cure into a rigid, stone-like relief surface.
Tips and Variations
- Two-Tone Wash: After the textured surface dries, lightly dry-brush warm terracotta or muted charcoal paint over the raised sand ridges while leaving the recessed valleys white.
- Natural Texture Additions: Fold small bits of crushed dried sea oats or crushed eggshells into the paste for organic micro-variations.
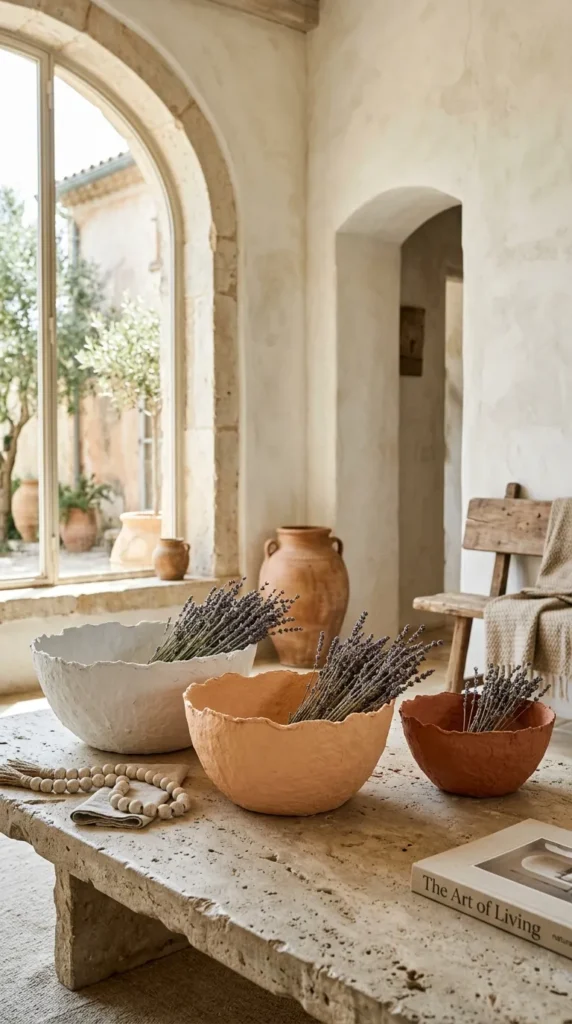
13. Sculptural Paper Pulp Summer Fruit Vessels
Introduction
Using upcycled egg cartons and cotton fibers, children learn traditional paper pulp moulding to shape lightweight, tactile, organic bowl vessels reminiscent of Mediterranean stone ceramics, perfect for holding small treasures or dried botanicals.
What This Idea Means
This project teaches zero-waste circular recycling, manual cellulose pulp reconstitution, and three-dimensional mold forming. It demonstrates how discarded paper packaging can be reconstituted into functional, tactile home decor.
Materials Needed
- Plain grey or cream cardboard egg cartons (shredded)
- Warm water and kitchen blender (designated for crafts)
- 2 tablespoons PVA craft glue or natural wheat paste
- Smooth ceramic bowls or citrus halves to serve as shaping molds
- Cling wrap (plastic film)
- Matte acrylic paints (warm ochre, peach, terracotta, chalk white)
- Soft round paintbrushes
How to Make It
- Tear cardboard egg cartons into tiny postage-stamp-sized pieces and soak them overnight in a bowl of warm water.
- Blend the soaked paper and water in a craft blender for 30 seconds until it forms a smooth, oatmeal-like cellulose mash.
- Pour the pulp through a fine mesh strainer and squeeze out excess water with your hands until the pulp holds together without dripping.
- Mix 2 tablespoons of PVA glue into the damp pulp mass to act as an internal strengthening binder.
- Invert a smooth ceramic bowl and wrap its exterior snugly with cling wrap.
- Press small balls of the paper pulp over the wrapped bowl mold with your thumbs, smoothing the patches together to form an even 5mm thick pulp shell. Keep the rim raw and organic.
- Allow the pulp bowl to dry over a sunny heater register or warm outdoor patio for 36 to 48 hours until completely rigid.
- Gently peel the paper bowl off the ceramic mold, remove the cling wrap, and paint the interior with soft, Mediterranean-inspired pastel tones.
Tips and Variations
- Botanical Pulp Inclusions: Mix dried lavender florets or calendula petals into the wet pulp before forming the bowl so colorful botanical flecks remain visible in the finished paper.
- Gilded Organic Edge: Trace the organic, deckled rim of the bowl with gold leaf paint.
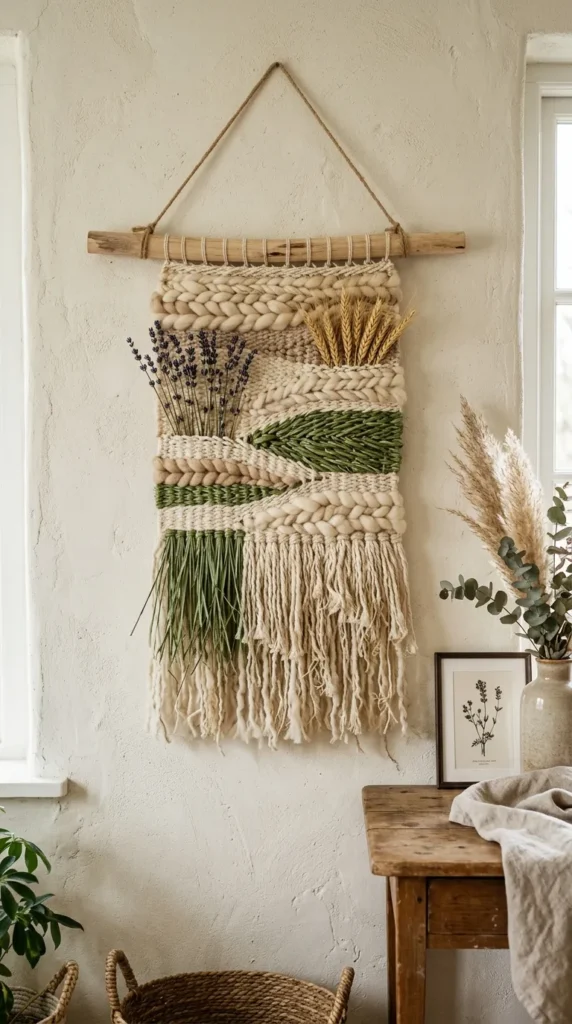
14. Modern Woven Summer Grass & Linen Wall Tapestries
Introduction
Embracing slow craft and fiber arts, this simple hand-loom tapestry project combines natural flax linen yarns with freshly picked backyard grasses, lavender stems, and wheat stalks, producing organic tactile wall art.
What This Idea Means
Children develop patience, bilateral hand-eye coordination, and an intuitive sense of pattern structure. Weaving wild natural botanicals introduces them to the rich history of indigenous and Scandinavian textile craft.
Materials Needed
- Heavy flat cardboard piece (9×12 inches) to act as a notched lap loom
- Sturdy cotton warp string (neutral ivory or unbleached cotton)
- Assorted weft materials: thick wool roving, linen ribbon, jute cord
- Freshly picked, flexible stems: switchgrass, lavender, chamomile, wheat heads
- Large blunt plastic tapestry needle
- Wooden driftwood branch (for hanging the finished tapestry)
How to Make It
- Cut 1/4-inch deep notches along the top and bottom edges of the cardboard piece, spaced 1/2 inch apart.
- Thread the cotton warp string back and forth between the notches to create a taut, vertical loom string grid.
- Thread a large plastic needle with chunky wool roving or linen cord. Weave over and under the vertical warp threads, pushing each horizontal row snugly down.
- After weaving 2 inches of wool base, insert fresh stems of lavender or switchgrass directly into the warp threads using the same alternating over-under motion.
- Alternate between soft spun fibers and crisp botanical stalks to build an organic, multi-textured landscape.
- Once the loom is filled, gently slip the top warp loops off the cardboard notches and tie them securely onto a smooth piece of ocean driftwood.
- Trim and knot the bottom warp threads, allowing the fringed yarn tails to hang down freely.
Tips and Variations
- Dried Bloom Shelf: As the fresh woven grasses dry over time, they will release delicate natural fragrances into the room while retaining their woven structure.
- Color Blocking: Weave distinct blocks of warm terracotta, mustard yellow, and raw linen roving between the grass bands to evoke summer horizons.
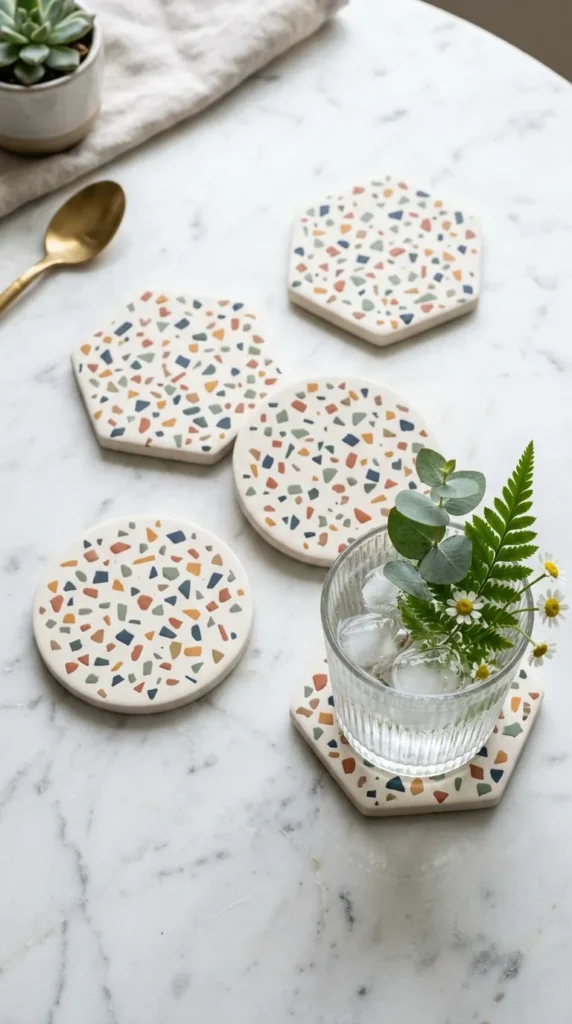
15. Minimalist Terrazzo-Style Polymer Clay Coasters
Introduction
Terrazzo is a classical Italian stone-composite material known for scattered, colorful mineral chips suspended in smooth concrete. Children can replicate this iconic aesthetic using colorful polymer clay chips embedded into a clean white clay base.
What This Idea Means
This craft introduces mosaic planning, pattern distribution, surface planishing, and geometric finishing. It shows how small, chaotic fragments can be arranged into balanced, contemporary designer home objects.
Materials Needed
- Polymer oven-bake clay (white base clay plus small scrap pieces of terracotta, sage, navy, and mustard)
- Clay acrylic roller or smooth glass bottle
- Circular or hexagonal cookie cutters (3.5 to 4 inches)
- Parchment baking paper and metal baking sheet
- 400-grit wet/dry sandpaper
- Matte water-based clay glaze
How to Make It
- Condition the primary white polymer clay by rolling it in your hands until soft, then roll it out onto parchment paper to an even 4mm thickness.
- Take tiny pinches of colored accent clay (terracotta, sage, navy) and roll them into small, irregular flat confetti flakes and thin slivers.
- Scatter the colored flakes across the surface of the white clay sheet, leaving negative white space between the chips.
- Place a sheet of parchment paper over the scattered clay. Roll the acrylic roller firmly over the surface to press the colored chips flush into the white base, creating a perfectly smooth, unified sheet.
- Stamp out clean shapes using the circular or hexagonal cookie cutter.
- Bake on a parchment-lined baking tray in an oven preheated to 130°C (275°F) for 20 to 25 minutes (adult supervision required).
- Once cooled, wet-sand the surface with 400-grit sandpaper under running water for a silky, stone-smooth matte finish.
Tips and Variations
- Marbled Inclusions: Lightly twist two colored scraps together before flattening into chips to create faux-marble mineral aggregates.
- Cork Base Backing: Glue a matching round disc of 2mm natural cork sheeting to the back of the finished coaster to protect furniture surfaces.
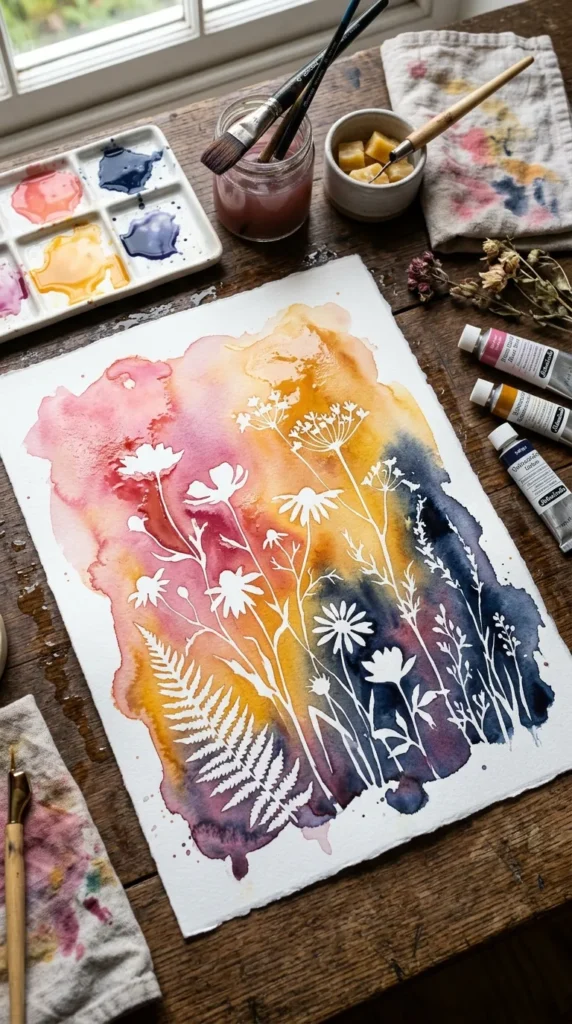
16. Watercolor Bleed & Natural Beeswax Resist Silhouettes
Introduction
Using the natural water-repelling properties of melted beeswax or natural wax blocks on heavy watercolor paper, children create luminous resist paintings with flowing, organic summer evening gradients.
What This Idea Means
This project demonstrates fluid dynamics, hydrophobicity (water-oil repulsion), and atmospheric color gradients. It allows children to work with natural bee products while practicing wet-on-wet watercolor blending.
Materials Needed
- 300gsm (140lb) cold-pressed watercolor paper
- Pure white beeswax crayons or natural pure beeswax blocks with angled edges
- Professional liquid watercolor or concentrated artist pan paints (sunset palette: warm rose, saffron, burnt sienna, indigo)
- Wide flat wash watercolor brushes
- Masking tape and flat wooden backing board
How to Make It
- Tape the watercolor paper securely to a wooden drawing board along all four outer edges to keep it flat when wet.
- Using the edge of a white beeswax crayon, press firmly to draw minimal botanical silhouettes, sweeping ocean waves, or abstract geometric circles. The wax will be almost invisible on the white paper.
- Wet the entire surface of the paper evenly with a wide brush and clean water until it holds a soft, satin sheen.
- Dip a loaded brush of wet liquid watercolor onto the damp page: watch the pigment bloom across the paper while instantly repelling away from the wax markings.
- Drop complementary tones (blending saffron yellow into soft rose and deep indigo) to create a glowing summer sunset wash across the surface.
- The hidden wax drawings will magically emerge as crisp, pure-white resist silhouettes against the rich, saturated watercolor fields.
- Allow to dry completely flat before peeling away the border tape to reveal crisp white paper margins.
Tips and Variations
- Wax Splatter Starfield: Lightly scrape a natural beeswax block over a fine cheese grater to scatter tiny wax flecks over the page before painting, forming a starry night-sky resist.
- Warm Iron Wax Removal: If a flat matte finish is preferred, place absorbent brown paper over the dry painting and run a warm iron over it to absorb the wax, leaving clean white raw paper silhouettes.
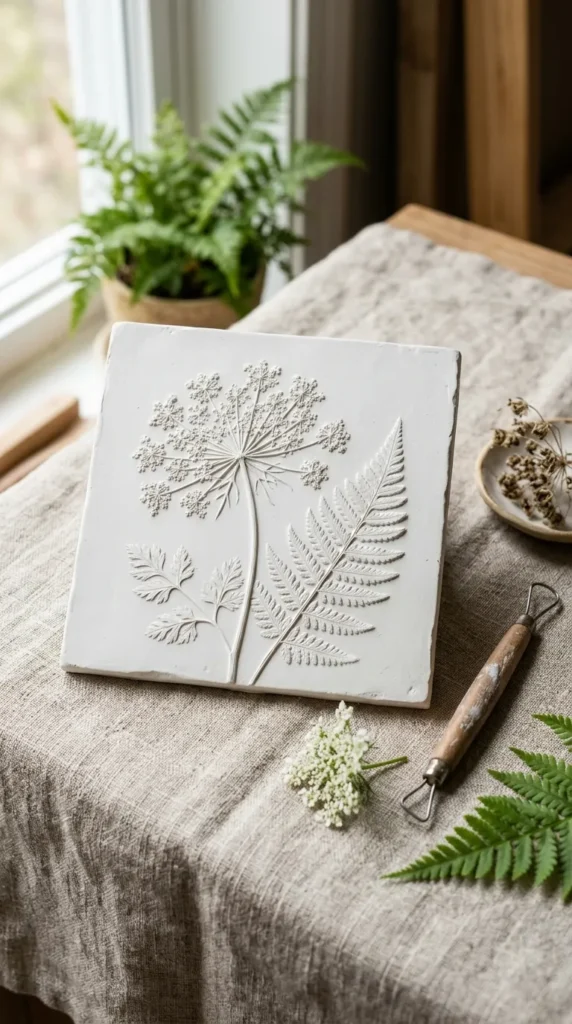
17. Minimalist Botanical Plaster Relief Casting Tiles
Introduction
Inspired by fine-art architectural panels, this studio project casts fresh summer botanicals directly into plaster tiles. The process captures delicate veins, petal edges, and stems in crisp 3D sculptural relief.
What This Idea Means
This project teaches industrial molding, structural setting times, and botanical anatomy. Children preserve the delicate structures of backyard summer plants in permanent, touchable plaster reliefs.
Materials Needed
- Air-dry clay or non-drying plasticine clay (for the mold bed)
- Fine casting plaster (Plaster of Paris)
- Fresh botanical specimens with deep textures (ferns, wild carrot blossoms, sage leaves)
- Square wooden craft frames or open shallow square plastic tubs
- Rolling pin
- Clean water, mixing cup, and metal spoon
How to Make It
- Roll out a 1/2-inch thick, smooth slab of plasticine or air-dry clay into the base of your square plastic frame.
- Arrange fresh, sturdy botanical specimens face down on the clay bed.
- Roll over the botanicals with firm, even pressure to push them deep into the clay surface.
- Carefully remove the plant material with tweezers, leaving a detailed negative imprint of the leaves and stems in the clay.
- Mix Plaster of Paris with water in a clean cup until smooth and pourable.
- Slowly pour the liquid plaster over the clay impression until it fills the container to a depth of roughly 1/2 inch.
- Tap the sides of the container gently to release any trapped air bubbles to the surface.
- Let the plaster set for 1 hour until warm and fully cured.
- Peel the soft base clay away from the hardened plaster tile to reveal the raised, 3D botanical fossil cast on the white tile surface.
Tips and Variations
- Earth Wash Patina: Mix a thin wash of burnt umber watercolor and brush it over the dry tile, wiping the top surface with a damp sponge so pigment settles into the tiny leaf contours.
- Framed Wall Cluster: Make four matching 4×4-inch botanical tiles and display them in a minimalist, square grid wall frame.
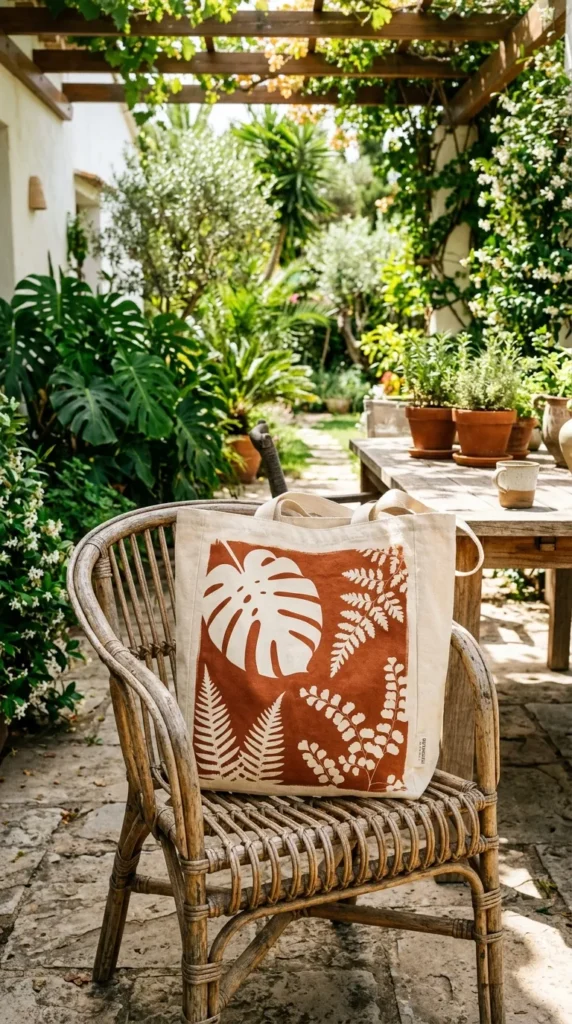
18. Modern Sun-Printed Solar Resist Dye Cotton Totes
Introduction
Using water-based solar-reactive transparent fabric dyes, children create functional, washable modern canvas tote bags. When wet dye is exposed to sunlight under opaque masks, the covered areas remain light while the exposed areas develop into rich, saturated tones.
What This Idea Means
This project moves sun-printing into functional, washable textile design. Children experiment with sun angles, chemical exposure times, negative space masks, and everyday utilitarian materials.
Materials Needed
- 100% natural unbleached cotton canvas tote bags
- Solar-reactive fabric dyes (such as Jacquard SolarFast)
- Foam paint roller or flat wide brush
- Flat sheet of rigid acrylic or glass
- Solid geometric cardboard cutouts or large pressed monstera/fern leaves
- Basin with SolarFast wash soap or mild laundry detergent
How to Make It
- Insert a piece of scrap cardboard inside the canvas tote bag to keep dye from seeping through to the back.
- In a dimly lit room, apply solar-reactive dye evenly across the front of the tote bag using a foam roller. Blot gently with a paper towel so the fabric is damp, not soaking wet.
- Place bold flat silhouettes (large fern leaves or cut geometric shapes) directly over the dyed canvas.
- Cover the arrangement with a clear acrylic sheet to hold the silhouettes flat against the fabric.
- Carry the tote outside into direct midday sunlight for 10 to 15 minutes. The exposed dye will visibly darken and develop rich color in the sun.
- Bring the bag back inside, remove the silhouettes, and wash the canvas immediately in hot water with mild detergent to wash out the undeveloped, unexposed dye.
- The masked shapes will remain permanent, crisp, ivory-white silhouettes against a rich, sun-baked color field.
Tips and Variations
- Photographic Transparency Prints: Print large high-contrast black-and-white family or pet photos onto clear transparency film and use them as exposure negatives on the tote bags.
- Monochrome Palette: Stick to rich single tones like Burnt Orange, Forest Green, or Indigo for a clean boutique aesthetic.
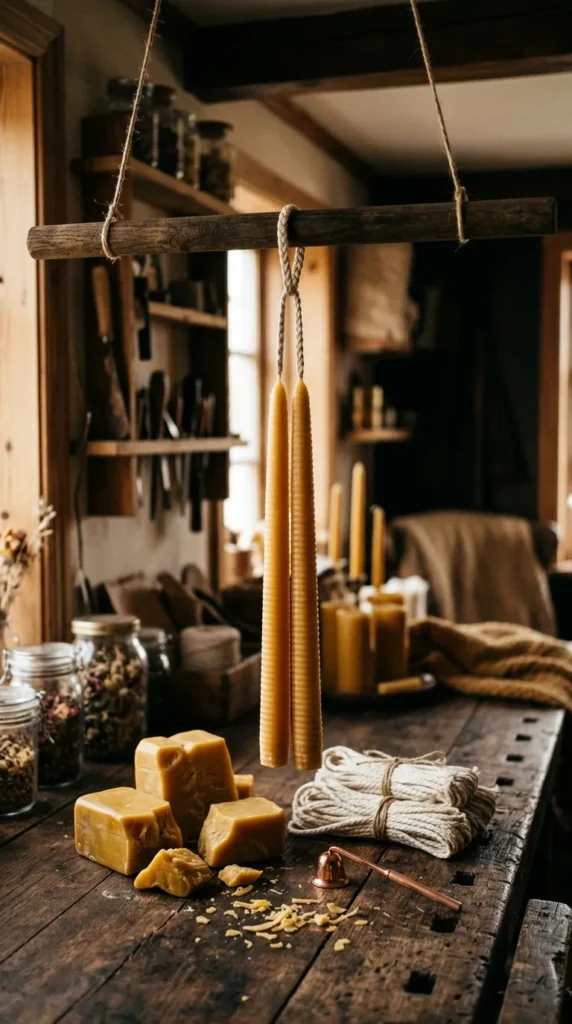
19. Scandinavian Hand-Dipped Beeswax Taper Candles
Introduction
A timeless craft celebrating warm light and natural scent, hand-dipping cotton wicks into melted pure golden beeswax allows children to build their own elegant pairs of tall, fragrant taper candles for summer evening dinners.
What This Idea Means
Candle dipping is an exercise in rhythmic rhythm, patience, and temperature control. Children learn about melting points, wax layer cooling rates, and the traditional history of household illumination.
Materials Needed
- 100% pure natural yellow beeswax pellets or blocks
- Tall, narrow heat-proof dipping container (such as an empty tall metal tin can)
- Deep pot for water bath (double boiler setup)
- 100% braided cotton candle wicking (#2 or #4 size)
- Small metal nuts or washers (to weight the wick base)
- Wooden drying rack or horizontal dowel supported between two books
How to Make It
- Melt beeswax in a tall metal can set inside a pot of gently simmering water over low heat (adult supervision required throughout melting).
- Cut a 16-inch length of braided cotton wick. Tie a small metal washer to each end to help the wicks hang straight during the initial dips.
- Hold the center of the wick string and lower both weighted ends simultaneously into the tall melted wax container for 2 seconds.
- Lift the wicks out smoothly, pausing above the container to let excess wax drip off, then let cool in room-temperature air for 45 seconds until the wax turns matte.
- Dip the wicks back into the wax, withdrawing them quickly. Each dip adds a micro-layer of warm beeswax.
- Repeat the dipping and cooling cycle 20 to 30 times. The tapers will gradually thicken from thin strings into smooth, golden candles with a rich honey scent.
- Once they reach the desired thickness (around 3/4 inch), snip off the bottom metal weights with scissors while the wax is still slightly warm, and hang the pair over a dowel to cure completely.
Tips and Variations
- Herb-Rolled Bottoms: While the wax is still tacky during the final dip, roll the lower third of the candles in finely crushed dried lavender florets or cedar needles.
- Fluted Base Carving: Use a small butter knife to gently carve clean fluted ridges along the bottom edge of the candle for a modern geometric look.
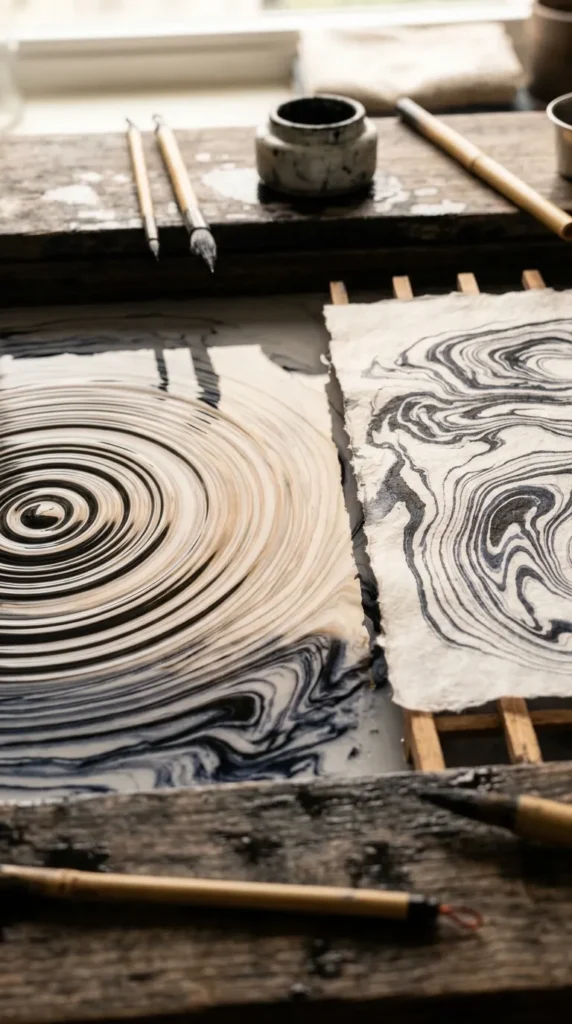
20. Modern Japanese Suminagashi Floating Ink Monoprints
Introduction
Suminagashi—meaning “floating ink”—is the centuries-old Japanese art of paper marbling. By alternating drops of non-toxic ink and surfactant onto a still water surface, children create delicate, concentric rings that are lifted onto absorbent handmade paper.
What This Idea Means
This craft teaches breath control, gentle touch, fluid surface tension, and dynamic pattern formation. Because no two fluid prints are identical, children embrace spontaneous, organic design.
Materials Needed
- Traditional Japanese Suminagashi marbling inks (or non-toxic marbling inks)
- Shallow rectangular water tray (slightly larger than your paper)
- Natural horsehair or fine pointed paintbrushes (two per child)
- Dispersal surfactant (Photo-Flo or diluted liquid dish soap)
- Japanese Washi, rice paper, or absorbent unglazed printmaking paper
- Clean tap water
- Newspaper strips (to skim the water surface between prints)
How to Make It
- Fill the shallow tray with 1 inch of tap water. Let the water settle until the surface is completely still.
- Hold one brush dipped in black or indigo Suminagashi ink and a second brush dipped in the surfactant liquid.
- Lightly touch the tip of the ink brush to the center of the water surface: a ring of pigment will spread over the water.
- Touch the surfactant brush directly inside that ink ring: the surfactant pushes the ink outwards, creating a clear void.
- Alternate touching the ink brush and surfactant brush in the center to build concentric, rippling bullseye patterns across the water surface.
- Fan the surface gently with your breath or a paper scrap to create marbled, flowing woodgrain curves.
- Gently lay a sheet of dry Japanese washi paper flat across the water surface for 3 seconds. The ink transfers instantly to the paper fibers.
- Lift the paper up by two corners to reveal the concentric marbled print, and lay flat on drying racks. Skim the water with a newspaper strip before starting the next print.
Tips and Variations
- Circular Masking: Cut circular cardstock masks and tape them behind the paper before printing to capture the organic Suminagashi ripples inside crisp geometric circles.
- Bookbinding Covers: Use dried marbled washi sheets to cover custom handmade summer journal notebooks and sketchbooks.